


Selecting the Best Irrigation Sprinkler Wire: 8 Helpful Tips
Choosing the right irrigation sprinkler wire helps ensure reliable communication between the irrigation controller and control valves.
The wire carries low-voltage electrical signals that open and close the valves according to the watering schedule. Using the correct wire gauge, insulation, and waterproof connections can prevent electrical problems and make future repairs easier.
Sprinkler wire runs underground alongside irrigation pipes, so it needs to withstand moisture, soil conditions, and normal wear. Before installing an automatic irrigation system, consider the number of zones, distance between the controller and valves, and wire specifications recommended by the valve manufacturer.
Table of Contents
How to Choose the Right Sprinkler System Wire Gauge & More
The appropriate irrigation sprinkler wire depends on your system’s layout, the number of control valves, and the distance between the irrigation controller and sprinkler valve manifold. Use these steps to select the appropriate wire, make reliable connections, and prepare the wiring for underground installation.
1: Understand How Sprinkler System Wire Works
Automatic sprinkler systems use low-voltage electrical wiring to connect the irrigation controller to the control valves. Each wire has a specific job in completing the electrical circuit and activating the correct irrigation zone.
- Controller Connection: The irrigation controller sends electrical signals through the sprinkler wire to activate individual control valves. When a programmed watering cycle begins, the controller energizes the appropriate valve solenoid to allow water into that zone.
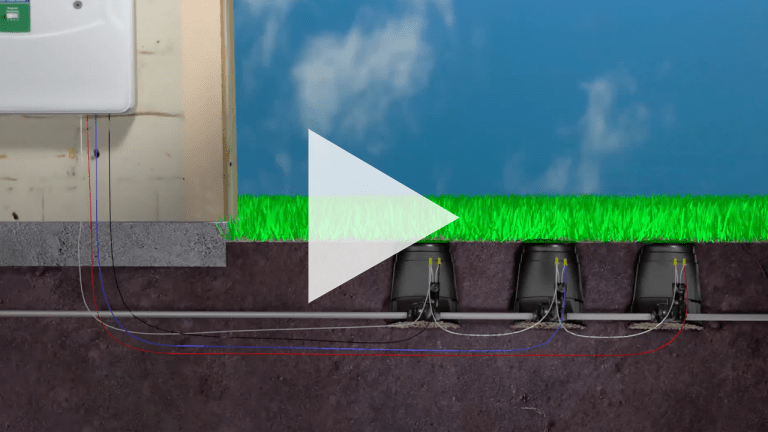
- Common Wire: The common wire connects to every control valve and provides the shared electrical return path for the system. It is typically white, making it easier to identify during installation, troubleshooting, and future repairs.
- Zone Wires: Each control valve needs its own individual zone wire connected to the controller. These wires are usually different colors, allowing you to identify which wire operates each zone.
- Wire Requirements: A conventional irrigation system needs at least one wire for each zone plus one common wire. For example, a six-zone system generally needs at least seven conductors, although additional spare wires can make future expansion and repairs easier.
2: Check the Recommended Sprinkler Wire Gauge
Sprinkler wire gauge determines the thickness of the individual conductors and how much electrical resistance they have. Choosing the right gauge helps maintain reliable voltage between the controller and valves, particularly when wires run longer distances.
- 16-Gauge Wire: 16-gauge direct burial wire is recommended for typical residential irrigation installations. Its thicker conductors offer less electrical resistance than smaller wires and provide a durable option for longer underground runs.
- 18-Gauge Wire: Eighteen-gauge wire can work for shorter runs, particularly when several valves are grouped together in a nearby manifold. However, its thinner conductors have more resistance, so check the manufacturer’s distance and voltage requirements before using it.
- Larger Wire: Lower gauge numbers indicate thicker conductors, so 14-gauge wire is thicker than 16-gauge wire. Longer wire runs or systems with greater electrical demands may require a larger conductor to maintain adequate voltage at the solenoids.
- Manufacturer Recommendations: Check the irrigation valve manufacturer’s specifications before choosing a wire gauge. The recommended size can depend on the solenoid’s electrical requirements, the distance from the controller, and the number of valves operating in the system.
3: Compare Common Sprinkler Wire Options
Direct burial irrigation wire is designed for underground installation and is available in different gauges and conductor counts. Always verify the wire’s direct burial rating, conductor count, and compatibility with your irrigation equipment.
Use the following comparison to narrow down your options based on your irrigation system’s layout. The table provides general guidance rather than a substitute for manufacturer specifications.
| Wire Type | Typical Application | Main Consideration |
| 16-Gauge Direct Burial | Residential irrigation systems | Durable, versatile choice for many installations |
| 18-Gauge Multi-Strand | Short runs and nearby valve manifolds | Lower-cost option for suitable distances |
| 14-Gauge Direct Burial | Longer runs or higher electrical demands | Thicker conductors reduce electrical resistance |
4: Choose the Right Number of Wire Conductors
The number of conductors in your irrigation sprinkler wire determines how many valves you can connect to a single cable run. Plan for every irrigation zone, the shared common connection, and any additional wires you might need later.
- Count Your Zones: Start by counting the individual control valves in your irrigation system. A system with eight zones needs at least eight individual zone conductors and one common conductor.
- Plan for Extra Wires: Consider purchasing a cable with additional conductors beyond your current requirements. Spare wires can support future zones or provide replacements if an existing conductor becomes damaged.
- Identify Wire Colors: Most sprinkler cables use a white common wire and different colors for individual zones. Keep a written record of which color connects to each valve so you can identify wiring quickly when troubleshooting.
- Check Local Requirements: Follow applicable electrical codes and manufacturer instructions for conductor identification. White is commonly used for the common wire, but verify the requirements that apply to your installation.
5: Use Waterproof Connectors for Underground Connections
Every outdoor sprinkler wire connection needs protection against moisture. Even direct burial wire can develop electrical problems if exposed conductors or poorly sealed connections allow water inside.
- Waterproof Wire Connectors: Use waterproof irrigation wire connectors designed for underground applications. Silicone-filled connectors, such as King Innovation waterproof wire connectors, help seal exposed wire connections against moisture.
- Proper Wire Preparation: Strip only enough insulation to make the connection and follow the connector manufacturer’s instructions. Make sure the conductors are securely joined before sealing the connection.
- Solenoid Connections: Each irrigation valve solenoid has two wires that connect to the common and zone wires. On standard two-wire solenoids, either solenoid lead can connect to the common or zone conductor unless the manufacturer specifies otherwise.
- Connection Protection: Keep all underground electrical connections inside appropriately sealed connectors. Ordinary wire nuts and electrical tape alone are not suitable substitutes for waterproof direct burial connections.

6: Splice Sprinkler Wire When Necessary
You can splice additional wire onto an existing run when the cable needs to reach a distant valve or when you need to repair a damaged section. The important part is making a secure electrical connection and protecting the splice from underground moisture.
- Match the Wire Gauge: Use compatible wire with an appropriate gauge for the circuit and total wire length. Avoid reducing the conductor size without checking the manufacturer’s electrical requirements.
- Make Secure Connections: Join the corresponding conductors and make sure each connection is mechanically secure. Loose connections can interrupt electrical signals and prevent valves from opening or closing properly.
- Seal Every Splice: Use waterproof, silicone-filled direct burial connectors to protect each connection. Every exposed conductor needs its own properly sealed connection.
- Leave Extra Wire: Pull a few additional feet of wire at each valve location rather than cutting the cable too short. This extra length makes it easier to access connections and complete repairs without replacing an entire wire run.
7: Route and Bury the Irrigation Sprinkler Wire
Plan the wire route before covering your irrigation trenches. Keeping the cable organized and accessible at important connection points makes installation and future maintenance easier.
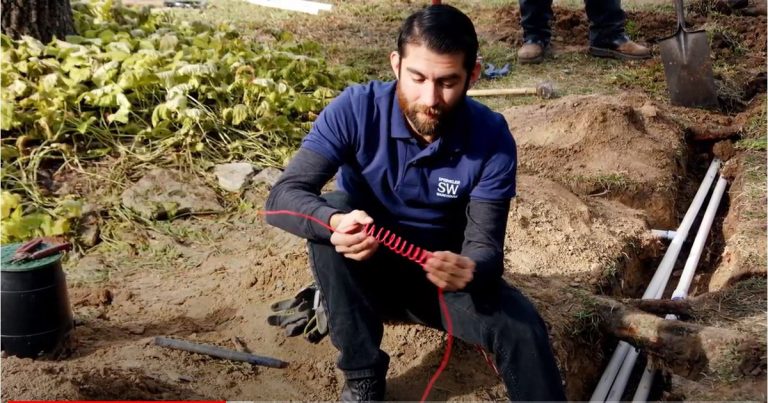
- Follow the Pipe Trench: Sprinkler wire can typically run through the same trench as the irrigation water pipe. Keep it positioned so it won’t be damaged by pipe installation, backfilling, or future maintenance.
- Protect Exposed Sections: Use appropriate conduit where wiring needs additional mechanical protection, such as near the controller or where cables emerge from the ground. Follow local requirements for conduit and burial depth.
- Keep Connections Accessible: Leave enough slack at valve manifolds and controller locations to work on the wiring later. Avoid burying splices or connections that may need to be inspected unless they are properly rated and sealed for direct burial.
- Document the Layout: Record the route of the wire and identify the colors assigned to each zone. This information can save time when locating damaged conductors or adding irrigation zones.
8: Connect the Sprinkler Wire to the Controller Safely
Once the wire is installed and connected to the control valves, finish by connecting the conductors to the irrigation controller. Follow the controller’s wiring diagram and disconnect power before making electrical connections.
- Turn Off the Power: Disconnect the controller from its power source before connecting or disconnecting valve wires. This helps prevent accidental electrical contact and protects the controller’s circuitry.
- Connect the Common Wire: Attach the white common conductor to the controller’s common terminal. Make sure the same common conductor is connected to the common lead of every control valve.
- Connect Zone Wires: Attach each colored conductor to its corresponding numbered zone terminal. Double-check your wiring notes to ensure the correct controller terminal operates each valve.
- Test the System: Restore power and run each irrigation zone individually using the controller’s manual settings. Check that the correct valve opens, water flows through the intended sprinklers, and each valve closes when its cycle ends.
Choose Irrigation Sprinkler Wire That Holds Up Underground
Selecting the right sprinkler system wire starts with matching the wire gauge and conductor count to your irrigation system. A little planning during installation can prevent wiring problems and make future sprinkler system repairs much easier.
For many residential installations, 16-gauge direct burial wire provides a dependable option. Use waterproof connectors for every underground connection, leave extra wire at valve locations, and follow the manufacturer’s electrical specifications.
FAQs for Irrigation Sprinkler Wire
What kind of wire do I need for my sprinkler system?
Most residential sprinkler systems use 16-gauge direct burial irrigation wire to connect the controller to the control valves. Choose a cable with enough conductors for each irrigation zone plus one common wire, and make sure it is rated for underground use. Always check the valve manufacturer’s specifications for recommended wire gauge and maximum run length.
How do I connect sprinkler wires to valves?
Each irrigation valve solenoid has two wires that connect to the sprinkler system’s common wire and an individual zone wire. Connect one solenoid lead to the common wire, typically white, and the other to the colored wire assigned to that zone. Use waterproof, silicone-filled direct burial wire connectors to protect every connection from moisture, and turn off power to the controller before working on the wiring.
How long can I run 18-gauge irrigation wire?
The maximum run length for 18-gauge irrigation wire depends on the solenoid’s electrical requirements, controller output, and total circuit resistance. Shorter runs between a nearby controller and valve manifold are generally suitable, but longer distances may require 16-gauge or thicker wire to prevent voltage drop. Check the irrigation valve manufacturer’s wire sizing chart to determine the maximum recommended distance for your specific equipment.
Can I splice sprinkler wire to reach farther?
It’s okay to splice extra wire onto the length of your runs. Just make sure to have a good tight physical connection, and use waterproof silicone sealed wire connector caps because you will be installing your wire in the trenches with the water pipe. It is normally true that your wire runs are much longer as they snake through your yard between the valves and the timer. Bury the wire in the trench with the PVC water pipe.
It’s a good practice to pull a few extra feet of wire at each control valve and run it loosely through the conduit so you’ll have a bit extra in the event of a needed repair. Your common wire will run to all of your valves. And the colored control wire will run from each valve directly to your control box. Once you have finished connecting the wires to all of your valves you can connect them to the timer.
If you want to stay up-to-date on the latest Sprinkler Warehouse news and make the most of all of our one-of-a-kind promotions, join the Irri-Gator community today. Happy watering, Irri-Gators!