


How to Upgrade to a Timed Sprinkler
Table of Contents
Tired of turning valves by hand every time your lawn needs water? Upgrading from a manual irrigation setup to a timed sprinkler controller is one of the easiest and most effective ways to save time, water, and money.
With a little planning and the right tools, you can transform your sprinkler system into a smart, efficient operation.
How to Upgrade Your Manual Sprinkler System
Upgrading from a manual sprinkler system to a timed (automatic) one can save you time, water, and hassle in the long run. In this section, we’ll walk you through the steps to modernize your setup and bring smarter, more efficient watering to your yard.
Step 1: Choose the Right Automatic Sprinkler Controller
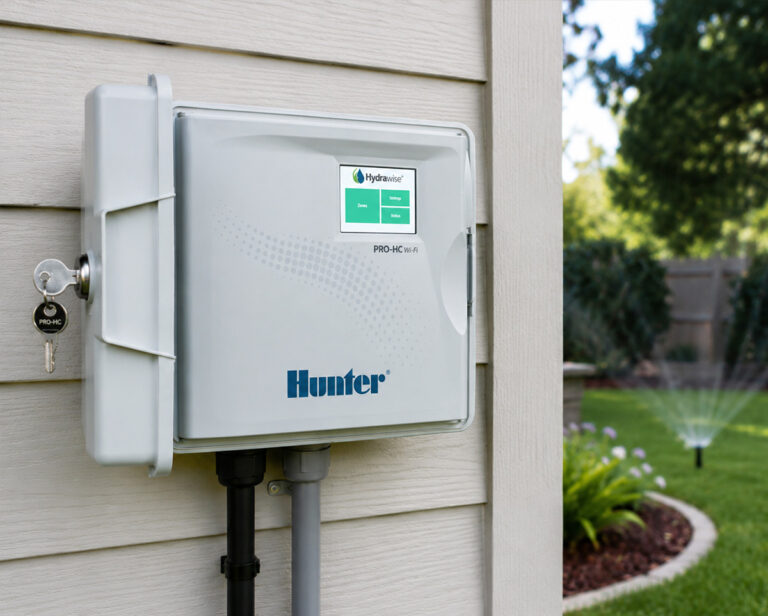
Before you start digging or splicing wires, you’ll want to choose an automatic controller that suits your yard and lifestyle. If you’re a fan of convenience, consider a WiFi-enabled smart controller. These systems allow you to control your sprinklers from your phone, automatically adjust watering schedules based on local weather, and they will even notify you if something goes wrong. For a simpler upgrade, a traditional programmable timer can still handle multiple zones and schedules with ease.
Make sure the controller you choose matches the number of zones in your irrigation system and is compatible with your valves.
Step 2: Locate or Install a Power Source
Automatic controllers need a power supply. Most are designed to plug into a standard outdoor-rated electrical outlet, while others can be hardwired.
Solar-powered controllers are also an option for remote areas or hose-end systems, although they tend to work best for smaller setups.
If you don’t already have an outdoor GFCI outlet near your valve manifold, you may need to hire a licensed electrician to install one safely.
Step 3: Connect to the Valves
Your irrigation valves are the gatekeepers of water flow, and they are what the automatic controller needs to communicate with for automation to happen. Each valve should already have two wires: one common wire (usually white) and one zone wire (color-coded). These wires run to the controller’s terminal block.
To connect:
- Match each zone wire to the corresponding terminal (Zone 1, Zone 2, etc.)
- Connect the common wire to the “C” or “COM” terminal
- Secure wires with waterproof connectors or wire nuts
If your manual system doesn’t already use electric solenoid valves, you’ll need to replace your old valves with compatible automatic ones.
Step 4: Program Your Controller
Once wired, it’s time to bring your system to life. Set up watering schedules based on your landscape’s needs—taking into account plant types, soil conditions, and sun exposure. Most controllers let you assign different programs (A, B, C, etc.) for flexibility. For example, lawn zones might water more frequently than flower beds.
Smart controllers can also help you stay within local watering restrictions and adjust in real-time for rain or drought.
Step 5: Test the System
After programming, run a manual test of each zone to make sure valves open and close properly, sprinkler heads are aligned, and there are no leaks.
Fine-tune runtimes and sprinkler angles if needed.
Simplify Your Irrigation Setup with Timed Sprinklers
Upgrading to an automatic controller doesn’t just add convenience, it promotes better plant health, improves water efficiency, and can even boost your property’s value.
Whether you go high-tech with a smart controller or stick with a simple timer, the investment pays off in time saved and healthier landscapes.
FAQs for Timed Sprinkler Controllers
Can I put my sprinkler on a timer?
Yes! You can add a timer to most sprinkler systems to automate watering schedules and save time. It’s a simple upgrade that works with both hose-end and in-ground systems. Timers help ensure consistent watering, even when you’re not home.
How does a timed sprinkler work?
A timed sprinkler uses a set schedule to open and close valves, watering your lawn automatically at your chosen times. You program the timer once, and it repeats the cycle daily or weekly. Some models allow different settings for different zones.
What is the difference between a sprinkler timer and a controller?
A timer is a basic scheduling device, while a controller may offer advanced features such as zone control, weather syncing, and smart technology. Timers are usually manual or battery-operated and ideal for simple setups. Controllers often connect to WiFi and adjust based on real-time conditions.
If you want to stay up-to-date on the latest Sprinkler Warehouse news and make the most of all of our one-of-a-kind promotions, join the Irri-Gator community today. Happy watering, Irri-Gators!