Today we’re going to do a quick overview of the Hydrawise app, which allows you to program and interact with any model of Hydrawise controller by Hunter. I’m Dwayne Smith, your Sprinkler Warehouse Product Specialist. Let’s get started.
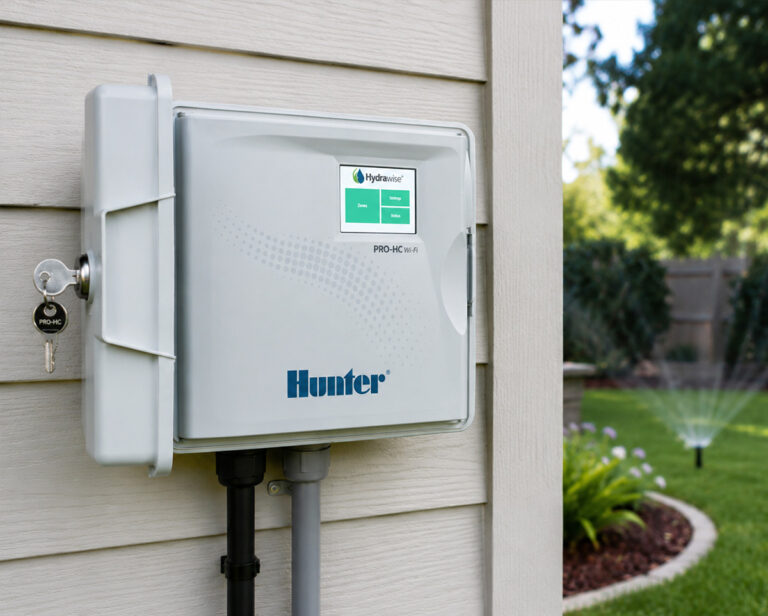
The Hydrawise application and web application allow you to program and interact with the HC, Pro-HC, Pro-C Hydrawise, and HCC models of controllers. Hydrawise is a program that allows you to manage controllers from anywhere you have an internet connection. It’s a powerful tool for homeowners to monitor their system, start and stop watering, and drastically reduce unnecessary water usage saving you tons of money and even sparing you some headaches.
For contractors, you can manage your clients’ controllers all from your office, offering amazing customer service and value. There is a small subscription fee for contractors. You can download the app for free. So let’s check it out.
How to Program Your Hydrawise Controller
This is a brief overview of the interface on a smartphone. If I covered every possible detail, the video would be way too long and you’d fall asleep. For this video, I’m going to assume that you’ve already hooked your controller up to WiFi and you’ve gone through the setup wizard.
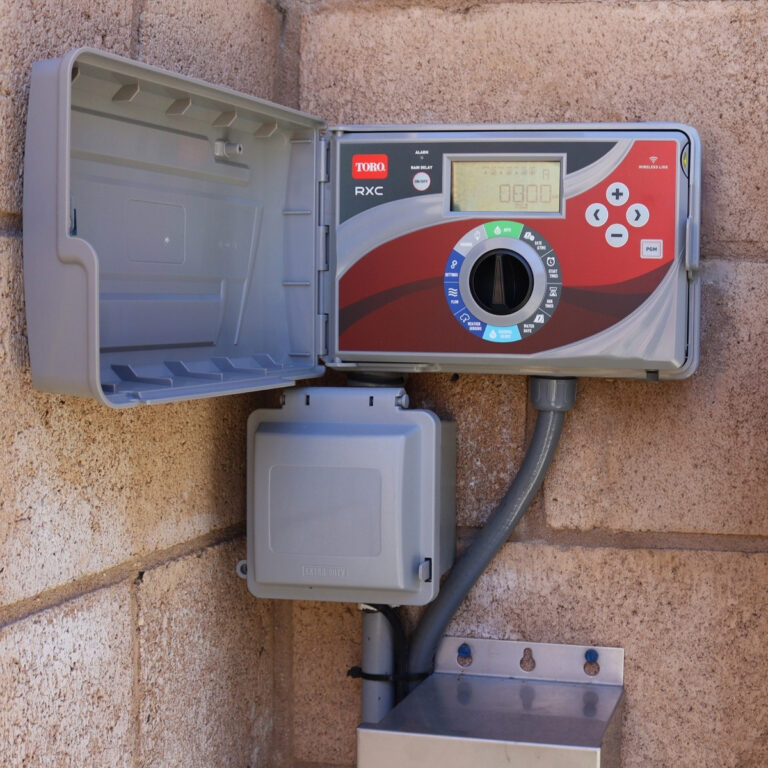
Right now I’ve got the application attached to a Pro HC. I’m going to leave the controller settings in standard mode. There is an advanced mode as well with a few more options, but for most people it’s unnecessary.
Using Your Hydrawise Controller’s Home Tab to Your Advantage
Let’s begin looking at the home tab. If you’re not there, push the Home button down at the bottom. In this first block, you can see your zones. Underneath that is your local weather forecast, information on temperature, and rainfall sensors. If you have a rain, rain and freeze, or flow sensor, etc., it will show up here and give you info. Right now that block right there is green. Green means business as usual. If it were red that would mean the sensor is stopping any irrigation from occurring right now.
And really important at the bottom is your Controller status. If you have a green checkmark then you are good. That means that you are connected to your system and any changes you make will actually work. So before you make any changes to your programing, always check for that green checkmark.
How to Adjust Sprinkler Zones to Maximize Growth
Let’s go back up and look at the zones. These icons here represent each of the zones that you have set up on your controller. If I tap on the icon for one of these zones, I can manually operate the zone or I can suspend watering for a given number of days. I’m going to hit the green arrow. It brings me to this page.
I normally have this zone set for 20 minutes so it gives me the option to run it for 20 minutes. I can adjust how long I want the zone to run by playing with this circle here. If I didn’t want to run zone one I can jump to one of the other zones here. So, let’s hit start here at the bottom and close out that screen. Now you can see that the icon has changed to a blue one and it’s sprinkling water, so I know the zone is running.
If for some reason you need to immediately stop a zone from running, tap the icon and hit the red box. Let’s suspend watering for a few days. I’m having work done in the front yard and I don’t want that sprinkler to come on for a few days. Tap on the icon and hit the pause button. That’s the two parallel lines. It brings me to this page. I can hit this button and pick the day to begin the suspended watering and hit the day I want the suspension to stop. Hit the suspend button at the bottom and close out of this screen. Now notice that this icon is lighter than the others, indicating that watering for this zone is currently paused. If you hit a zone icon, and hit this little “I” button, you can see all kinds of information about the zone, like when it’s scheduled to water and its recent history.
Similar to working with the individual zones, you can do the same operations with all zones at once. Hit the gear icon here. Let’s do a “Run All Zones.” It brings you to this page. By default, all zones are selected to run their normal cycle amounts. You can deselect any zones you don’t want to run. If you want to run all zones for a given amount of time rather than the preprogrammed amount, uncheck this box right here and choose the amount of time you want each zone to water. Hit “run now.” As you can see, our first zone is going. Let’s stop that for now and I’ll cancel the suspension. If you hit the Zones tab down here, you can see a little information on each of the zones, but you can customize some things here. Hit this little edit button here – the one with the pencil icon. You can change the zone name here. If you want, you can add some additional information if you find that helpful. As you can see, there’s a pretty good amount of room to work with. You can pick an icon for the zone.
What may not be obvious at first glance is that you have opened multiple pages here with lots of choices. You can get to them through the next tab down here, or up here there’s a drop-down menu. Cycle and Soak allows you to slow down your watering if you have trouble with a lot of runoff because your soil doesn’t absorb water quickly enough. Cycle time is the maximum amount of time to run a zone before pausing and the Soak time is how long the pause lasts before restarting the zone. Under Advanced, it allows you to fine-tune your watering by adding or decreasing the watering time by percentage.
Another thing you can do, which you might find helpful, is you can take a picture and use it to identify your zone. Hit the Picture icon right here and select your pic. If you want, you can go back and select that picture as the zone icon. Now on the Home tab, you can see I’ve got the picture as the icon.
Let’s go back to the Zones tab now. Up here at the top, I can click on Programs. This is where the main programming for your controller takes place. Right now I’ve only got one program set to water Monday, Wednesday, and Friday. If you hit the Edit icon down here with the pencil, you can change the program. You can name your program. I called this one Standard. You can name it whatever you want. I’ve got it set on Virtual Solar Sync.
There’s a Time Based Schedule, which is standard. The zones are going to run the way you’ve set them to. Then there’s Virtual Solar Sync. With Virtual Solar Sync, you don’t have to have an actual solar sync sensor. It uses information based on local forecasts to determine your needed water usage taking into account Evapotranspiration. Don’t expect me to say that word again. That is figured on rainfall and temperature and it adjusts your watering times accordingly, saving you money and keeping your landscape in good shape.
Selecting Sprinkler Controller Start Times on Hydrawise Controller
On to Start times. Right now it’s Monday, Wednesday, and Friday. We can change that. Now it’s Monday, Wednesday, and Saturday. You can hit this menu here and change to odd or even days or interval watering, which is every so many days. Here you can change your watering start time and you can add multiple start times.
Here are your runtimes for each zone. As you can see I have different numbers of minutes planned for my various zones. You don’t have to include every zone within this program; you could have a separate program for certain zones if you wanted.
Hunter Hydrawise Scheduling Adjustments
Schedule Assignments. Here you can set your triggers the way you want them. When you’re starting new plants or sod, they need extra water at the beginning. So if this program is your lawn getting established, you could have this program start and end on specific dates. That’s not what this program is so I’m not going to use that.
Monthly adjustments. You can change how you water by percentage for each month of the year. I’m going to have my sprinkler system completely shut off for the months of December, January, and February. So you can adjust each month according to your landscape’s needs. And we’re done here.
Just for fun, let’s add another program. Let’s say I want to water my front yard flower beds every day. Hit “Add Program.” Let’s just have this be a time-based schedule. The other schedule was Monday, Wednesday, and Saturday. So let’s make this Sunday, Tuesday, Thursday, and Friday. We’re going to start it at 6 a.m. and I’m going to select zone 2 because that’s where my flower beds are. I’m going to water them for 15 minutes. Okay, so there’s my program: ALL ZONES for Monday, Wednesday, and Saturday. Sunday, Tuesday, Thursday, and Friday are just zone 2. You don’t have to do it that way. You could relegate zone 2 to its own program and water it every day, but I’ve got it that way so if I just want to run program one my flowerbeds still get some water. That’s our zones and programs. This is another way to start a zone, similar to the way you did over here. And over here: All kinds of reports that I will let you play with. If you are in charge of multiple sites, you can access your dashboard here, but you do have to have one of the subscription plans for that.
That’s the quick rundown of the Hydrawise app. It’s going to give you plenty of control over your watering schedules. Order your Hunter Hydrawise controllers today on sprinklerwarehouse.com.
Jumping back to the zones, tab right
at the top next to where it says zones. There’s a tab for programs, so if you tap on the programs tab now, you can see programs where your irrigation zones live to come on on specific days at specific start times for a specific duration of time running. A lot to digest there but my first program here says backyard and it’s time-based and it waters on Sunday, Monday, Wednesday, Friday, and Saturday. Blue days are a representation of irrigation days, white days, non-irrigation days. It starts at 10 pm and it has zones 1 through 8 in that program. To the right, I can see the duration of time that each one of those is expected to run for. Now if I want to edit that information, simply press the rectangle with the pencil in the lower right-hand corner. Now if I want to change the name of that particular program, I can go ahead and do that, call it Program A, and hit the Next button. At this point, we have a couple of different variables in terms of choosing our days of the week. You know we could simple select that we want to run on Monday, Wednesday, Friday, or if you’d like, you can run an odd or even or interval watering days so let’s just say we want to go even this time. If we want to change the time of day that cycle starts, we can change it and from there hit Next and Now. You can change which stations live in the program and the duration of time that they’re going to run in that program. So if we decide Zone 1 40 minutes is just a little bit too long, we can go ahead and edit that down. If we decide we no longer want zone 8 in that specific program, we can deselect it and you notice over on the right the runtime disappears so only the zones that are checkboxed will be in that program so if we wanted to add zone 11 to it, we simply tab on it and then put in the duration of time we want it to run and once we’ve done so, hit the OK button and then you can see a synopsis of that information you edited. Some people like to put their flowers and their turf in different programs. Hydrawise will allow you to do so.
If you’re depending upon the model of controller that you have and the hydraulics of your irrigation system, you may not be able to run two programs simultaneously but under the reporting tabs which we’ll get into in later training, you can see what you’ve programmed and what that looks like on a daily, weekly, or monthly calendar.
How to Use the Remote Tab Tap on Hunter Hydrawise
The final thing we’re going to take you through today is the remote tab tap dead center at the bottom. If you simply click on the remote, we know we can initiate or deactivate irrigation from the home screen from the remote tab. It just is a little bit slicker of a feel so at the very top if we want to run a specific zone, it’ll show the duration of time that it’s scheduled for in a program, but if we’re just kind of playing around in the backyard, I encourage you to go down and click on Zone Tester. When in the backyard I encourage you to go down and click on Zone Tester. When you do that, it’ll show you which zone you’re highlighted on, which is currently zone one. By simply pressing the green triangle that’ll initiate irrigation, so I’ll close this very quickly, jump back to the Home Screen so you can see that’s reflected in. Zone one is currently running. If I want to jump back to remote I can advance and it will advance from station one to two or I could stop station two and go down to say zone five and initiate irrigation there. So very easy to activate manual station and deactivate. You can run programs manually, manual stations manually, or the zone tester mode, as I showed you already.
That’ll conclude basically your introduction today to Hydrawise. You have acquired the most feature-rich, technologically-advanced WiFi irrigation controller in the market today. We have given you a good introduction to that application. It’s extremely feature-rich, and if you would like to take a deeper dive, we encourage you to look at the rest of your YouTube videos or go to hunterindustries.com and click on the video library for a full training across all of the features and benefits that Hydrawise totes. Thank you for your time, and enjoy.