



Insulate Backflow Preventers in 7 Steps
A backflow preventer can crack when water trapped inside its valves, chambers, or connected pipes freezes and expands. Learning how to insulate a backflow preventer before freezing weather arrives can help protect the device from costly damage and keep your irrigation system ready for spring.
Read on for simple backflow preventer insulation steps, from preparing the device to protecting exposed pipes and fittings from freezing.
Table of Contents
How to Insulate a Backflow Preventer in 7 Steps
Insulating a backflow preventer is straightforward, but the details matter. Work from the water supply through the entire exposed assembly so you do not leave an unprotected valve, fitting, or section of pipe vulnerable to freezing.
1: Shut Off the Water Supply
Start by stopping the flow of irrigation water into the backflow preventer. Removing the water supply and pressure before insulating gives you a safer starting point and reduces the amount of water that can remain trapped inside the assembly.
- Close the Supply Valve: Locate the shutoff valve supplying the irrigation system and close it completely. This prevents additional water from entering the backflow preventer while you prepare it for freezing temperatures.
- Relieve Pressure: Follow the manufacturer’s instructions for relieving pressure through the appropriate shutoff valves, test cocks, or bleed points. Do not randomly open or close components because the correct procedure varies between backflow preventer types.
- Drain the Backflow Preventer: Remove as much trapped water as the manufacturer’s winterization procedure allows before adding insulation. Foam and covers can slow heat loss, but they cannot guarantee protection if water remains trapped inside the backflow preventer during prolonged freezing temperatures.
2: Choose the Right Backflow Insulation
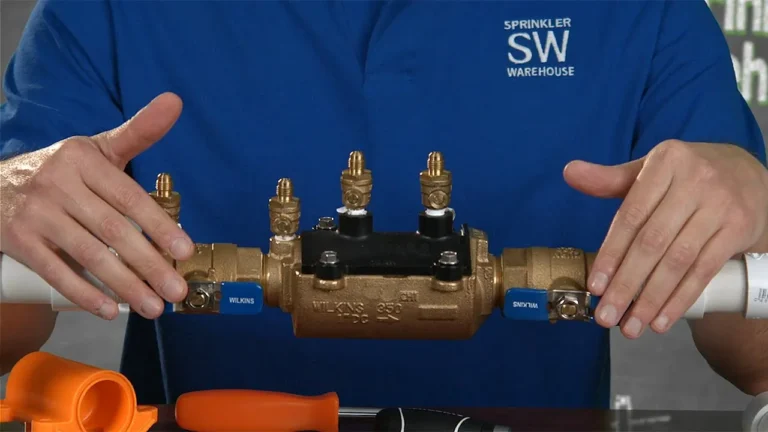
The best insulation depends on the backflow preventer’s size, configuration, installation location, and exposed piping. For many above-ground irrigation installations, foam pipe insulation protects the connected pipe while an insulated backflow pouch provides coverage around the irregular shape of the valve assembly.
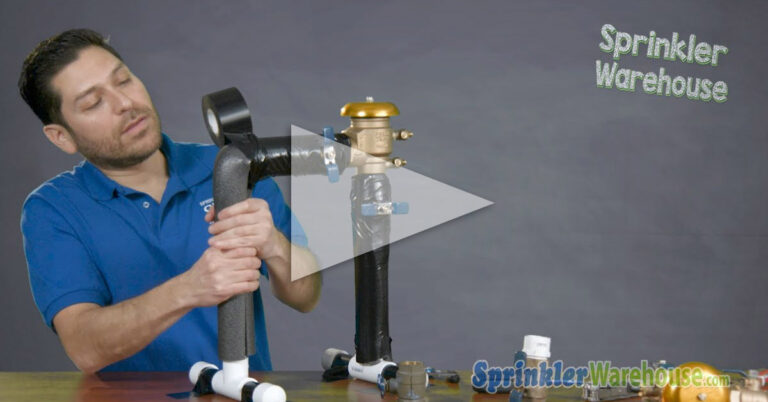
- Foam Insulation: Use appropriately sized foam insulation on exposed supply and outlet piping around the backflow preventer. Cut the material to fit rather than leaving gaps around elbows, fittings, or other exposed sections where cold air can reach the pipe.
- Backflow Insulation Cover: Use a purpose-made backflow insulation cover to protect the backflow preventer itself. A cover is especially useful because the irregular shape of a backflow preventer can be difficult to insulate completely with standard foam pipe insulation.Just make sure you choose the right size backflow preventer cover by measuring the width and length of your backflow device.
- Pipe Wrap Tape: Use pipe wrap tape to secure foam insulation and close seams or overlapping sections. A snug fit helps keep insulation in position during wind, rain, snow, and repeated temperature changes throughout winter.
3: Insulate the Supply Side
The supply side is the pipe that brings water from the main water supply to the backflow preventer. Insulate this exposed pipe and its fittings because freezing can damage them and allow cold temperatures to reach the backflow preventer.
- Cover Exposed Pipe: Measure and cut foam insulation to cover the exposed supply-side pipe leading toward the backflow preventer. Extend the insulation over as much exposed piping as practical instead of protecting only the section immediately next to the valve.
- Wrap the Fittings: Pay attention to elbows, unions, nipples, shutoff valves, and other connections along the supply side. These components can retain water and may need additional insulation or a suitable cover to eliminate exposed areas.
- Secure the Foam: Use pipe wrap tape to hold the insulation firmly in place and keep seams closed. Avoid leaving loose sections that can shift or expose the pipe after installation.
4: Insulate the Backflow Assembly and Outlet Side
The outlet side is the pipe that carries water from the backflow preventer to the irrigation system. Protect this exposed piping and its fittings along with the backflow preventer itself, which can retain water in its internal passages even after the irrigation supply is shut off.
- Cover the Backflow Preventer: Place the backflow insulation cover over the device according to the cover manufacturer’s instructions. Make sure it provides full coverage without blocking required drains, relief openings, test cocks, or other components that must remain accessible.
- Protect the Outlet Pipe: Install foam insulation around the pipe leaving the backflow preventer and continuing toward the irrigation system. Cover exposed fittings and connections along this side as well, especially where the pipe remains above ground.
- Seal the Coverage: Check the entire assembly for gaps between the foam insulation, pouch, pipe, and fittings. Use pipe wrap tape where appropriate to secure insulation and close openings that could expose the pipe to cold air.
5: Match the Insulation Approach to the Backflow Type
Different backflow preventers have different internal designs and installation requirements, so there is no single winterization procedure for every assembly.
The table below provides a practical overview, but you should always follow the manufacturer’s instructions for the specific device at hand.
| Backflow Preventer Type | Typical Freeze Concern | Insulation Considerations |
| Pressure Vacuum Breaker (PVB) | Pressure vacuum breakers are often installed above ground, leaving the assembly exposed to freezing temperatures. | Insulate the exposed backflow preventer, piping, and fittings, then drain as directed. |
| Reduced Pressure Zone (RPZ) | Multiple chambers and internal passages of reduced pressure zone backflow preventers can retain water that may freeze and damage the assembly. | Drain all chambers as directed, then insulate the exposed backflow preventer and connected piping without blocking relief ports. |
| Double Check Assembly (DCA) | Some double check assembly backflow preventers are installed underground or inside valve boxes, while above-ground installations remain exposed. | Insulate the exposed backflow preventer and piping, with proper drainage especially important for underground installations. |
| Atmospheric Vacuum Breaker (AVB) | The atmospheric vacuum breaker assembly can be exposed to freezing temperatures and should not remain under continuous pressure. | Drain as directed, insulate the exposed parts, and do not leave the backflow preventer with the irrigation supply valve open or water continuously supplied to the device. |
6: Inspect Your Winter Protection
Finish by checking the entire installation rather than assuming the backflow preventer is protected because it has a cover. Insulation can shift, become saturated, or leave small exposed areas, especially after repeated weather changes.
- Check for Gaps: Look around the backflow preventer, pipe connections, fittings, and both sides of the assembly for exposed areas. Add or reposition insulation wherever cold air can reach exposed pipe or components.
- Secure the Cover: Make sure the insulated backflow pouch stays securely positioned over the backflow preventer. The cover should protect the device without crushing insulation or obstructing components that need to remain accessible.
- Inspect During Winter: Check the insulation periodically in areas with prolonged freezing weather, especially after strong wind, heavy snow, or ice. Replace damaged or displaced insulation before the next extended freeze.
7: Safely Thaw a Frozen Backflow Preventer
If your backflow preventer has already frozen, thaw it slowly and inspect it for damage before restoring water to the irrigation system. Avoid high heat that can cause rapid or uneven temperature changes and damage the device.
- Use Gentle Heat: Apply warm towels or carefully controlled warm air to gradually thaw the frozen backflow preventer. Do not use an open flame, torch, or other high-heat source.
- Check for Damage: Once the device has thawed, inspect the backflow preventer, fittings, and connected piping for cracks, leaks, bulges, or other visible damage. Look closely around connections and exposed sections where freezing water may have caused damage.
- Restore Water Carefully: If there is no visible damage, follow the manufacturer’s instructions for returning the backflow preventer to service. If you find cracks, leaks, or other damage, keep the water supply shut off and have the device repaired or replaced before using the irrigation system.
Protect Your Backflow Preventer Before the Freeze
Knowing how to insulate backflow preventers can help prevent freeze damage before winter arrives. Shut off and drain the assembly according to its specific requirements, cover exposed piping with foam insulation, secure it with pipe wrap tape, and finish with an insulated backflow pouch when appropriate.
The most important step is to prepare before the first hard freeze. A few minutes spent checking the entire backflow assembly and its insulation can help prevent cracked components, leaks, and expensive repairs when the irrigation system starts up again in spring.
FAQs About Insulating Backflow Preventers
What materials do I need for insulation?
To winterize your backflow preventer, you’ll need foam pipe insulation sized for your pipes, and insulation tape to secure and seal the foam. If you don’t have any insulation, you can still use blankets or insulated covers for extra protection on above-ground valves. Remember, the key is to ensure that all exposed pipes and valves are fully covered to prevent freeze damage.
Do I need to drain my backflow preventer?
Yes, insulation alone usually isn’t enough. Water trapped inside valves or chambers can still freeze and crack the device. Always drain your backflow preventer by opening bleed valves or test cocks before insulating. Proper draining, combined with insulation, provides full protection against freeze damage.
How do I tell if my backflow preventer was damaged by freezing?
After winter comes to a close, inspect your backflow preventer for cracks, leaks, or bulges in the valve body or pipes. Sometimes damage will be obvious, but other times, hairline cracks may be more subtle. As such, you should also check for reduced water pressure, unusual sounds, or dripping when the system is on. Any of these signs may indicate possible freeze damage.
Will a backflow preventer freeze?
Yes. A backflow preventer can freeze when water remains inside the device or its exposed piping during freezing temperatures. Proper drainage and insulation can help reduce the risk of cracked components and freeze damage.
How to winterize your backflow preventer?
To winterize a backflow preventer, shut off the irrigation water, relieve pressure, drain the device as directed by the manufacturer, and insulate exposed piping, fittings, and the backflow preventer with appropriate insulation or a cover.
What are insulated covers for backflow preventers?
Insulated covers for backflow preventers are protective covers designed to help reduce heat loss and shield exposed devices from freezing temperatures. They fit over the backflow preventer while allowing required components to remain accessible.
If you want to stay up-to-date on the latest Sprinkler Warehouse news and make the most of all of our one-of-a-kind promotions, join the Irri-Gator community today. Happy watering, Irri-Gators!