How to Fix Underground Leaks
Table of Contents
How to Repair a Leaking Water Pipe Underground
When your sprinkler system isn’t at its best, it might be time to conduct underground water line repair. For some, this can be a daunting task, especially if you have little to no experience with sprinkler repairs. The idea of digging up your lawn irrigation system and tinkering with the existing installation is intimidating, and there is some risk involved when you take on this DIY project.
However, there is no reason to panic. We’ve made this comprehensive guide to help you through the entire process, from selecting the right tools and finding the leak, to digging up your lawn efficiently and fixing the sprinkler pipe leak itself. With patience and determination, anyone can use this guide to confidently learn the inner workings of their sprinkler system, save money, and keep the lines free of leaks for the foreseeable future.
Why You Should Fix Leaking Sprinkler Pipes Immediately
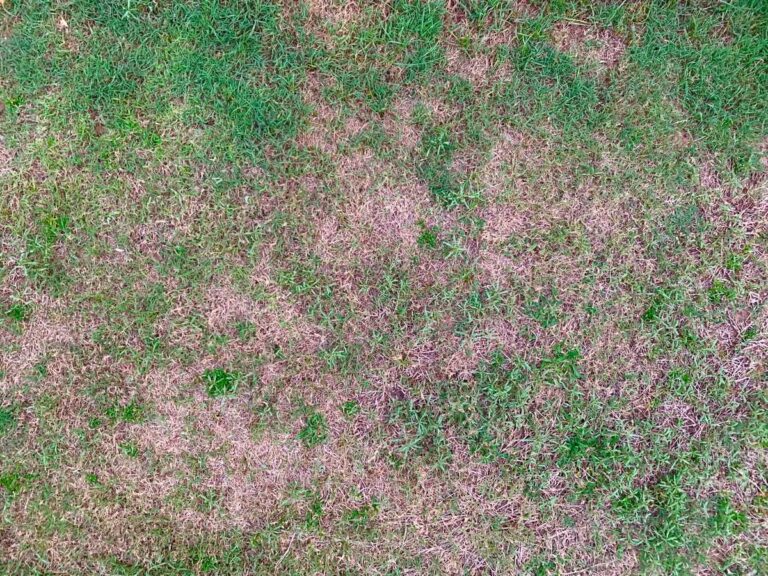
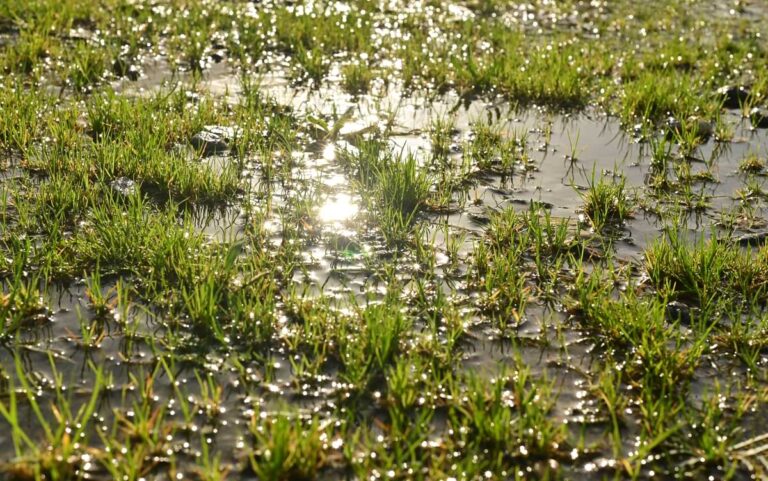
An underground sprinkler leak is something that needs to be addressed immediately, usually because they are hard to detect when it initially occurs. A main indicator of a sprinkler leak is a higher-than-usual water bill or some wet patches throughout your lawn, even though you haven’t turned on the sprinklers in a while.
It’s at this point where you need to start thinking about how to fix leaking sprinkler pipes. When left unchecked, these leaks can cause long-term water damage. Leaks closer to your home and other structures can weaken foundations and other underground structures. In general, leaks can also create underground cavities and sinkholes, which can grow to dangerous proportions and cost you even more to repair.
If it wasn’t apparent, fixing sprinkler pipe leaks isn’t something that you should put off for a weekend project; it needs to be a priority, if nothing else, to ensure that your home and your surrounding area are safe from potential water damage.
Tools Needed for Underground Water Line Repair
Before starting your project, you’ll need the right tools and repair parts on hand to make it easier to dig up your lawn, find the leak, and make repairs to the affected area. At the top of the list is safety gear: invest in protective eyewear and gloves to protect yourself from cuts or sudden surges in water pressure or electricity. It also goes without saying, but make sure to turn off the water main and electrical power to your sprinkler system before you even start. If necessary, make sure you also get the prerequisite permits or call 811 before you dig.
Other irrigation tools to consider include:
- A shovel: Dig up dirt with ease and get access to your sprinkler line.
- Hacksaws or PVC shears: These allow you to easily cut the broken PVC pipes.
- Pliers and wrenches: Take off connectors or couplers with ease.
- Tape, sealant, and caulk: These materials allow for a solid seal when installing the new pipes.
- Water meter or pressure gauge: Use these measurement tools to determine if your new installation can handle the current water pressure needed to keep your system running at peak performance.
- Water leak locators and kits: These make it easier for you to find the source of your sprinkler leak, saving you time when digging around your lawn.
How to Fix Underground Leaks
Step 1: Find the Leak
Before you fix a leaking sprinkler pipe, you will want to accurately find the source of the underground leak. We previously mentioned that you might see wet patches on a dry lawn, which could indicate a general area for the leak. However, you still don’t want to spend valuable time digging out a larger area when there are tools available that make it easy to pinpoint the source.
The most common tool for leak detection is a leak noise locator, which can detect these abnormalities based on noise frequency. For instance, smaller leaks emit a higher frequency while larger punctures produce low-frequency tones. Locators catalog these sounds to tell the user if the pipes underneath the device are leaking.
You can also opt for a leak noise correlator, which can be useful for larger systems or affected areas. These use multiple sensors, which are placed on the pipe with the suspected leak. The correlator then utilizes algorithms based on factors such as noise frequency and the time it takes for certain sounds to reach the sensors to give you an accurate placement of the leak.
Regardless of the device used, it’s essential that you get an accurate location for the leak to save time and reduce errors. Rather than digging up your entire sprinkler system line and potentially breaking other parts of your setup, these devices can help you locate the leak so that you only dig up the necessary space needed to assess, remove, and replace the damaged pipes.
Step 2: Dig Around the Affected Area
Now that you know where the leak is located, it’s time to start digging. Fortunately, you don’t have to dig too deep to reach the pipes. In most cases, these pipes are only 8–12 inches below the surface of your lawn – a fairly accessible depth.
Before you break ground, we advise digging at an angle rather than straight downwards. This is because digging straight down runs the risk of causing more damage to the pipe or, even worse, breaking another section of your system.
You want to aim for a hole around the broken pipe that is at the very least one foot deep and one foot wide, which should give you more than enough room to make the necessary repairs. During the digging process, it’s also important to make sure that dirt doesn’t enter the water system. Dirt can easily clog your water lines, creating an imbalance in water pressure, which can affect the overall performance of your sprinklers.
Step 3: Cut Away the Broken Pipe
Before cutting off the damaged section of your system, make sure that you turn off the water main to reduce the high pressure flowing through the pipe. This makes it easier for you to repair the affected area without the added staring of high water pressure, not to mention the fact that you won’t be as wet when conducting repairs.
For PVCs, use your saw to cleanly cut away the damaged pipes. If your system uses copper tubing, use a tubing cutter to remove the leaky pipe. Regardless of the material, it’s important that you make a clean cut to make it easier to install connectors for the replacement pipes.
Step 4: Replace with the New Piping
With the damaged pipe out of the way, it’s now time to put in the replacement. To ensure a secure fit, you’ll also most likely need a connector to link the existing and new pipes. Most people will use PVC as the replacement material, so make sure you have PVC primer and cement on hand for a secure bond.
If the connectors or the new pipe require threading, make sure you have Teflon or plumber’s tape to put over the threads. This ensures a more secure fit that, more importantly, also prevents any leaks from coming through the threads. Before you move on to the next phase, make sure that the primer and cement from the new connections dry for at least 24 hours. Check out our full guide on PVC pipe repair for more information.
Step 5: Test the Fit
Once the connections are secure, it’s time to test your work. Turn on the water main and slowly increase the water pressure up to the intended levels needed for your sprinkler to work normally. If you don’t notice any leaks in your repairs, you can move on to cleanup. Otherwise, you will need to diagnose any additional leaks that continue to pop up.
Step 6: Cleanup
With the leak problem sorted and your tests confirming that the new pipe can handle the water pressure, it’s time to finally put your lawn back to its presentable form. Fill the hole around the pipe with soil until it’s level with the rest of your lawn surface. Additionally, cover the area with new grass seed or sod so that it blends in with the rest of your lawn.
Fix Leaking Sprinkler Pipes Without Issues
With the steps and tools above, it’s never been easier to roll up your sleeves and tackle the demanding, yet rewarding work that comes with underground water line repair. With enough experience and confidence, you can continue to make these repairs when necessary, on top of your regular maintenance, to ensure that your sprinkler is operating at its best throughout the year to elevate your lawn space as the envy of the neighborhood.
FAQs on Underground Water Line Repair
Why is it important to fix a leaking sprinkler pipe?
It’s important to prioritize fixing sprinkler pipe leaks because it can lead to long-term water damage. Leaks that occur near your home are especially dangerous because they can potentially damage your foundation as well as other nearby structures on your lawn, like gazebos or canopies.
Can an underground sprinkler leak get worse?
One leak isn’t necessarily indicative of a larger problem, but if left untreated, it can affect your whole irrigation system. You’ll notice lower water pressure, moisture patches where the leak occurs, and, of course, higher water bills. Aside from the structural issues mentioned above, Underground sprinkler leaks can also eventually lead to cavities and sinkholes, which can be catastrophic.
How do I avoid other sections of my sprinkler system from leaking?
Routine maintenance can help you spot leaks before they become major issues. In addition to cleaning parts and checking the current state of your system, our guide also mentions leaks as one of the final steps of inspecting your system. Smaller leaks can be sealed with goof plugs, but leaks that affect overall performance and pressure will need new pipes.