How To Install Sprinkler System On Sloped Areas
Watering Hillside
This article is an installation guide for sloped areas and hillsides. It explains how to install drip line irrigation systems in areas with sparse and dense foliage as well as slopes that have a combination of the two.
Sparse Application:
In order to have proper soil saturation, evenly spaced rows of dripline are essential on any slope.
Dripline must be chosen depending on your soil type and it is essential to select an irrigation timer that controls your water applications as well. Sprinkler Warehouse can provide you with all of the essential tools and information for any sparsely sloped project, however immense.
How to Install Irrigation System On Slopes:
- Determine the water source
- Create a plant list
- Know what type of soil you have
- Design how you will layout the drip
- Gather equipment
- Assemble the drip lines
- Connect the system
- Test the system and check for leaks
- If you have a timer, the last thing to do is set it
Shop drip irrigation supplies at the Sprinkler Warehouse
Advantages: Installation Guide For Sparse Sloped Areas
- Saves 70% water
- Eliminates overspray and run-off
- Improves seed germination
Note: Don’t add too many drip emitters as this can reduce the overall delivery capabilities of your system.

Dense Application: Installation Guide For Sloped Areas & illsides
Effective slope irrigation is a mixture of good upfront planning, proper installation, and a solid maintenance technique. If all three are done properly, many emotional, financial, and physical problems can be avoided and a healthy, aesthetically pleasing slope planting will be the result.
Because many slopes are planted with a ground cover instead of turf, consider installing an efficient controlled release watering drip line to help eliminate runoff and encourage healthy root growth.
How to Install:
- Assemble Control Zone Kit and connect to a water source
- Connect Easy-Fit Adapter to Easy Fit Tee for connection to Control Zone Kit
- Cut lengths of landscape drip line to build a grid in the planting area
- Connect lengths of landscape drip line to Easy-Fit Fittings to create grid, add Air Relief Valve Kit to the zone
- Stake landscape drip line grid in place and flush for 2 minutes
- Install planting material
Shop drip irrigation supplies at the Sprinkler Warehouse
Advantages: Installation Guide For Dense Sloped Areas
- Saves up to 70% water
- Eliminates overspray and run-off
- No runoff of fertilizers into groundwater
Note: Don’t add too many drip emitters as this can reduce the overall delivery capabilities of your system.

Sprinkler Hillside Applications
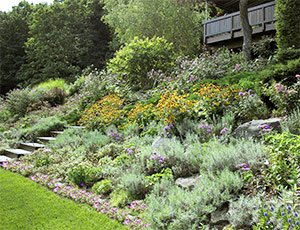
Hand watering on a hillside is not only ineffective; it can be a pain and can cause erosion. Even if you do not terrace your beds, you can still irrigate successfully with drip lines. This is an effective way to provide adequate water to each level and not drown out the bottom level of plants.
How to Install:
- Determine the water source
- Create a plant list
- Know what type of soil you have
- Design how you will layout the drip
- Gather equipment
- Assemble the drip lines
- Connect the system
- Test the system and check for leaks
- If you have a timer, the last thing to do is set it
Shop drip irrigation supplies at the Sprinkler Warehouse
Advantages: Installation Guide For Sloped Hillsides
- Saves 70% water
- Eliminates erosion and run-off
- Less weed growth


