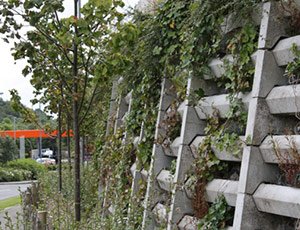
How Drip Irrigation Can Work For You
This article is an installation guide for drip line irrigation on crib walls. In order to avoid runoff or pooling of water in blocks, it is important to break up the watering cycles on a crib wall. There are many advantages to drip irrigation for a crib wall; the most important one would be that it requires much less maintenance for an individual.

Another advantage would be that erosion of the wall would be reduced dramatically when using a target watering drip system. Sprinkler Warehouse can provide you with the tools and knowledge to install your own beautiful crib wall garden.
Materials: Installation Guide For Crib Walls
- Compensating Drip
Line (100 ft.) - Rain Bird XCZLF100PRF Xerigation Low Flow Control Zone
Kit (1 inch) - Rain Bird ARValveKit 3/4 in. Air Relief Valve Kit
- Drip Irrigation Universal Fittings
Shop: Drip Tubing, Rain Bird Control Zone Kits, and more!
How to Install: Installation Guide For Crib Walls
- Assemble Control Zone Kit and connect to a water source
- Cut lengths of landscape drip line to build grid in crib wall
- Connect lengths of landscape drip line to Easy-Fit fittings to create a grid, add Air Relief Valve Kit to the zone and connect to Control Zone Kit
- Stake landscape drip line grid in place and flush for 2 minutes
- Install planting material
- If you have a timer, the last thing to do is set it
Advantages: Installation Guide For Crib Walls
- No soil erosion
- Reduces maintenance requirements
- Saves up to 70% of your water
Note: Don’t add too many drip emitters as this can reduce the overall delivery capabilities of your system.


