



How to Winterize an Outdoor Faucet
Knowing how to winterize outdoor faucets can help prevent frozen pipes, cracked faucet bodies, and costly water damage when temperatures drop. The process is straightforward, but simply covering a faucet is not always enough.
Proper outdoor faucet freeze protection starts with shutting off the water supply, draining exposed plumbing, and protecting any components that can still hold water.
How to Winterize Outdoor Faucets Step by Step
The right winterization method depends on whether your outdoor faucet has a dedicated shutoff, whether the pipe runs through a heated or unheated space, and how severe your local winters are.
Use these steps to prepare the faucet before freezing weather arrives, paying particular attention to any water that could remain trapped inside the faucet or supply line.
1: Remove the Garden Hose and Attachments
Start by disconnecting everything from the outdoor faucet so water can drain freely. A connected hose can trap water against the faucet and prevent proper drainage, increasing the risk of freeze damage.
- Remove the Hose: Disconnect garden hoses, splitters, timers, spray nozzles, and other attachments from the faucet. Drain the hose separately and store it somewhere protected from freezing temperatures.
- Inspect the Connection: Check the faucet threads and hose washer for damage while everything is disconnected. Replace worn washers or damaged attachments before storing them so they are ready for use in spring.
- Keep the Faucet Clear: Do not leave a hose or accessory attached over the winter, even if the faucet is covered. The connection can retain water and interfere with drainage.
2: Identify Your Faucet and Freeze Risk
Not every outdoor faucet is exposed to the same freezing risk, so identify the type of faucet and how its supply line is routed. This helps determine whether basic draining is sufficient or whether the plumbing needs additional protection.
Faucet Setup | Freeze Risk | Winterization Priority |
Frost-free faucet | Lower when installed correctly | Disconnect hose and verify drainage |
Standard hose bib | Higher | Shut off, drain, and insulate |
Faucet with interior shutoff | Moderate to high | Shut off valve and drain exterior section |
Pipe through unheated space | High | Drain and insulate exposed plumbing |
Damaged or leaking faucet | High | Repair before freezing weather |
3: Locate the Shutoff and Inspect the Supply Line
Before shutting anything off, determine exactly how the outdoor faucet is supplied and where its vulnerable plumbing is located. Knowing where the water enters the exterior section makes it easier to isolate the faucet and find areas that may need additional insulation.
- Check the Pipe Route: Determine where the faucet’s supply pipe travels after entering the building. A pipe that passes through an unheated wall, crawl space, basement, or garage may need additional protection.
- Find the Shutoff: Look for a dedicated interior shutoff valve if the faucet has one. Knowing exactly which valve controls the outdoor faucet makes it easier to isolate and drain the exposed section.
- Check for Multiple Faucets: If the property has several outdoor faucets, determine whether each one has its own shutoff. Some homes have separate valves for individual hose bibs, while others use one valve for multiple exterior lines.
- Consider Your Climate: Short, occasional freezes require different precautions than prolonged subfreezing weather. When temperatures regularly remain below freezing, take extra care to eliminate trapped water and protect exposed plumbing.
4: Shut Off the Water Supply
If the outdoor faucet has a dedicated interior shutoff valve, close it before temperatures fall below freezing. This isolates the exterior section of plumbing so additional water cannot enter the line while you prepare it for winter.
- Close the Interior Valve: Turn the shutoff valve fully clockwise if it is a standard hand-operated valve. Do not force a valve that is stuck, corroded, or difficult to operate because forcing it can cause damage.
- Check for Multiple Faucets: If the property has several outdoor faucets, determine whether each one has its own shutoff. Some homes have separate valves for individual hose bibs, while others use one valve for multiple exterior lines.
- Watch for Leaks: After shutting off the supply, inspect the valve and nearby pipe for dripping or seepage. A leaking shutoff may not completely isolate the outdoor faucet and should be repaired before freezing weather.
5: Drain the Outdoor Faucet and Exposed Pipe
Draining is one of the most important parts of winterizing an outdoor faucet because water expands when it freezes. Once the supply is shut off, open the faucet and allow trapped water to escape from the exterior section of the line.
- Open the Faucet: Turn the outdoor faucet on after closing its interior shutoff. Leave it open until water stops flowing so the isolated section has an opportunity to drain.
- Open the Drain Port: If the interior shutoff has a drain cap or bleeder port, open it according to the valve design. Place a container underneath or use a towel to catch water released from the line.
- Leave It Open If Appropriate: Some plumbing setups are designed to remain open after draining during winter. Follow the design of the shutoff and faucet rather than closing every valve automatically.
6: Check for Trapped Water
A faucet can still contain water after the main flow stops, particularly when sections of pipe slope upward or contain low points. Inspect the exposed plumbing and faucet body for locations where water could remain trapped and freeze.
- Inspect Low Spots: Look for sections of pipe that dip, sag, or create a pocket between the shutoff and faucet. These areas can hold water even after the faucet has stopped draining.
- Check the Faucet Body: Make sure the faucet itself is not retaining water because of its orientation or a blockage. A standard hose bib can be especially vulnerable when water remains inside its body during a hard freeze.
- Address Damaged Parts: Replace cracked fittings, leaking valves, or deteriorated washers before winter. Existing damage can become worse when trapped water freezes and expands.
7: Protect the Faucet With a Hose Bib Cover
Once the faucet has been shut off and drained, add insulation around the exposed fixture when freezing weather is expected. A hose bib cover or insulated faucet pouch can provide an additional layer between the faucet and cold outdoor air.
- Choose a Proper Fit: Select a cover designed to fit securely over the outdoor faucet and seal around the base. A loose cover can allow cold air to circulate around the fixture and reduce its effectiveness.
- Seal the Opening: Secure the cover according to its design so cold air cannot easily enter from the bottom. Insulated pouches with fastening systems such as hook-and-loop closures can help keep the opening snug around the faucet.
- Use Durable Protection: Outdoor covers should be able to withstand moisture, sunlight, and repeated seasonal use. Water-repellent outer materials, reinforced construction, and durable seams can help an insulated cover hold up outdoors.
8: Insulate Exposed Plumbing
A faucet cover protects the fixture itself, but it does not protect a vulnerable section of pipe farther inside the wall or beneath the building. Insulate accessible exposed piping in unheated areas where freezing temperatures could reach the water line.
- Protect Accessible Pipe: Use appropriate pipe insulation around exposed supply lines in garages, crawl spaces, basements, or other cold areas. Cover the pipe continuously where practical, paying particular attention to fittings and exposed sections near exterior walls.
- Avoid Blocking Drainage: Insulation should protect the pipe without preventing the faucet or drain point from releasing water. Do not wrap a drained faucet so tightly that you accidentally create a pocket where water can remain trapped.
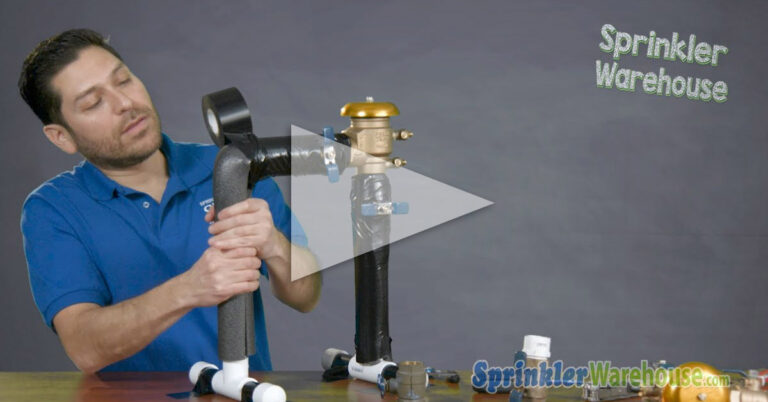
- Protect Other Components: If the exterior plumbing connects to additional valves, fittings, or backflow-related components, inspect those parts for freeze exposure as well. Every section capable of holding water should be considered when planning outdoor faucet freeze protection.
9: Inspect the Faucet During Freezing Weather
Winterization is not a one-time inspection if temperatures remain below freezing for extended periods. Check the protected faucet and surrounding plumbing periodically, especially after severe weather or unusually long cold snaps.
- Look for Ice or Damage: Inspect the faucet, cover, and accessible piping for ice buildup, cracks, bulging, or unusual moisture. Do not try to force a frozen faucet open because doing so can damage the fixture or connected plumbing.
- Check the Interior: If accessible, inspect the area around the interior shutoff and the pipe where it enters the exterior wall. Signs of moisture, dripping, or staining can indicate a leak or freeze-related problem.
- Recheck the Cover: Make sure the hose bib cover remains securely attached after wind, rain, snow, or repeated temperature changes. Replace or reposition a damaged cover so the faucet remains protected throughout the cold season.
Protect Outdoor Faucets Before the Freeze
Learning how to winterize outdoor faucets is mostly about removing the conditions that allow water to freeze inside vulnerable plumbing. Disconnect the hose, shut off the supply, drain the exterior line, address trapped water, and add a properly fitted hose bib cover and pipe insulation where needed. Taking these steps before the first hard freeze can help protect outdoor faucets and the plumbing connected to them from preventable winter damage.
FAQs for Winterizing Outdoor Faucets
Do outside faucets need to be winterized?
Yes, especially standard outdoor faucets connected to plumbing exposed to freezing temperatures. Shutting off the water, draining the faucet and exposed pipe, and adding a hose bib cover can help prevent trapped water from freezing and damaging the plumbing.
What is the best way to insulate an outdoor water faucet?
The best approach is to first shut off and drain the faucet, then install a properly fitted hose bib cover or insulated faucet pouch. For additional protection, insulate exposed supply piping in unheated areas such as garages, crawl spaces, and exterior walls.
Can your pipes still freeze if your water is turned off?
Yes. Turning off the water supply prevents more water from entering the line, but water already trapped inside the faucet or pipe can still freeze and expand. Proper winterization should therefore include draining the exposed plumbing in addition to shutting off the water.
If you want to stay up-to-date on the latest Sprinkler Warehouse news and make the most of all of our one-of-a-kind promotions, join the Irri-Gator community today. Happy watering, Irr-Gators!