



Sprinkler Winterization: A Guide
Sprinkler winterization helps to protect your irrigation pipes, valves, sprinkler heads, backflow preventers, and other sprinkler components from freezing temperatures.
The right approach depends on your climate and system design. In areas with prolonged freezes, you’ll usually need to drain or blow out the system, while milder climates may only require shutting off the water, draining exposed components, and protecting above-ground plumbing.
Table of Contents
How to Winterize Sprinklers in 9 Steps
Winterizing a sprinkler system is mostly about removing water from places where it can freeze and expand. Use the steps below as a practical checklist, then choose the drainage method that best fits your irrigation system.
1: Shut Off the Irrigation Water
Start by stopping the water supply to the irrigation system before draining or blowing out the lines. Locate the irrigation shut-off valve and make sure the valve and any other exposed plumbing are protected from freezing temperatures.
- Close the Shut-Off Valve: Completely shut off the main water supply to the sprinkler system before beginning winterization. If the valve is located outdoors or in another exposed area, make sure it is protected from freezing as well.
- Separate Irrigation From Household Water: The irrigation shut-off should stop water from entering the sprinkler system without shutting off water to the rest of the property. If your system has a dedicated irrigation meter or shut-off, use that valve.
- Check for Exposed Plumbing: Above-ground pipes are more vulnerable to freezing because they do not have surrounding soil to provide insulation. Drain and insulate exposed irrigation piping, valves, and other components before temperatures drop.
2: Shut Down the Irrigation Controller
Once the water is off, put the irrigation controller into rain mode or turn it off for the season. This prevents scheduled watering cycles while preserving your programmed settings for spring.
- Use Rain Mode: Rain mode is usually the easiest option for an electronic controller because it suspends watering without deleting the programmed schedule. The exact setting may be labeled differently depending on the controller.
- Turn Off Mechanical Timers: Older mechanical timers may need to be unplugged or switched off completely when the system is no longer being used. This prevents unnecessary operation during the off-season.
- Leave the Controller Powered When Appropriate: Modern electronic controllers can generally remain connected to power when placed in rain mode. Follow the manufacturer’s instructions if your controller has specific winterization requirements.
3: Drain the Backflow Preventer and Exposed Components
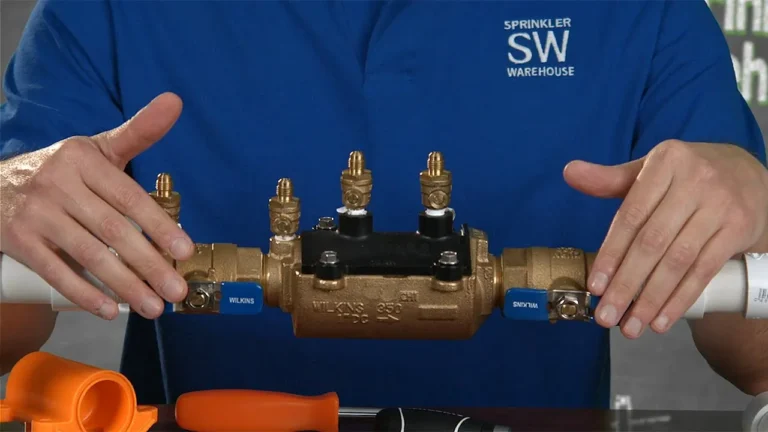
Backflow preventers are among the most important components to protect because they often sit above ground and contain water that can freeze. Drain the device according to its design, and remove it for indoor storage when the system allows.
- Drain the Backflow Preventer: Close the isolation valves and open the appropriate test cocks or drain points to release trapped water. Some systems are better protected by removing the backflow preventer completely and storing it in a protected location.
- Remove With Union Connections: If the backflow preventer uses union connections, disconnect the unions and remove the device without cutting the piping. This makes seasonal removal much easier and can save considerable work when spring startup arrives.
- Protect Exposed Openings: After removing the device, cover exposed pipe ends with appropriate threaded caps or protection to keep dirt, insects, and other debris out. Do not create a sealed arrangement that can trap water where it may freeze.
- Drain Above-Ground Valves: Any valves installed above ground should also be drained and protected. Heat cables can provide additional protection in some installations, but they should not be treated as a substitute for proper drainage because a power outage can leave exposed components vulnerable.
4: Choose a Sprinkler Winterization Method
After the water supply is shut off and exposed components are addressed, choose the drainage method your system is designed for. Most systems use a manual drain, automatic drain, or compressed-air blowout, and some use more than one method.
| Method | Best For | What It Does | Important Note |
| Manual Drain | Systems with manual drain valves | Releases water through valves at low points | May not drain sprinkler heads or backflow devices completely |
| Automatic Drain | Systems with automatic drain valves | Opens automatically when pressure drops | Activate a zone to release pressure, then drain exposed components |
| Blowout | Systems designed for compressed-air winterization | Pushes water out through sprinkler heads | Requires the correct compressor, pressure, fittings, and safety precautions |
5: Drain the Sprinkler System
Drain any water that remains in the irrigation lines after the water supply is shut off. The goal is to remove as much standing water as possible before freezing weather arrives.
- Use Manual Drain Valves: Open manual drain valves located at low points in the system and allow the mainline to drain. Depending on the system, these may be ball valves, stop-and-waste valves, or globe valves.
- Open Backflow Test Cocks: If the system uses a backflow preventer with test cocks, open them as appropriate to release trapped water. Sprinkler heads with check valves may also need to be raised so water can drain from the lateral lines.
- Use Automatic Drains: Automatic drain valves typically open when system pressure falls below a set level. Activate an irrigation station to release pressure and allow the drains to operate, then drain the backflow preventer and other exposed components separately.
- Remove Remaining Water: Some systems retain water in low spots even after normal drainage. A wet/dry shop vacuum can sometimes remove residual water from accessible sections, although a complete system blowout may be more practical for larger installations.
6: Blow Out the Sprinkler System
A sprinkler system blowout uses compressed air to push water out of the irrigation lines and sprinkler heads before it can freeze. It’s usually the most thorough way to winterize a sprinkler system in places with sustained freezing temperatures.
Because excessive air pressure can damage irrigation parts and create a serious safety hazard, professional winterization is recommended when you are unfamiliar with the equipment or system.
- Use the Right Air Compressor: A proper blowout requires substantial air volume rather than simply high pressure. An air compressor capable of roughly 50 to 100 CFM is commonly recommended for irrigation blowouts, depending on system size and configuration.
- Regulate Air Pressure: Use an air compressor with an accurate pressure regulator and gauge. Do not assume that a system rated for high water pressure can safely withstand the same pressure from compressed air.
- Protect Yourself: Wear eye protection and never stand over sprinkler heads, valves, pipes, or other irrigation components while compressed air is being introduced. Flying debris and component failures can cause serious injuries.
- Connect Downstream of the Backflow Preventer: Connect the air compressor to an appropriate blowout fitting on the irrigation side of the backflow preventer. A dedicated hose connection, quick coupler, or properly installed tee and threaded fitting can provide an accessible connection point.
- Open One Zone at a Time: Start with one irrigation zone and gradually introduce air while keeping an eye on pressure. Never operate the compressor against a completely closed irrigation system.
- Move Through Each Zone: Allow water to discharge through the sprinkler heads until the line is effectively cleared, then shut that irrigation zone off and move to the next. Repeat the process for every zone, using the system’s recommended pressure and sequence.
- Avoid Excessive Air Exposure: Stop blowing a zone once water has been removed rather than continuing to force dry air through the line unnecessarily. Prolonged compressed-air exposure can increase the risk of damaging components.
- Repeat When Appropriate: A second pass through each zone can help remove remaining water from low spots. Do not close every valve while the compressor is running.
7: Protect Sprinkler Heads, Outdoor Faucets, and Above-Ground Plumbing
Winterization does not end when the underground irrigation lines are drained. Any water-filled component exposed to freezing temperatures can potentially crack, split, or otherwise fail.
- Protect Sprinkler Heads: Most properly drained underground sprinkler heads are protected by the surrounding soil, but heads and exposed risers can still contain residual water. Make sure that you address the check valves, low-head drains, and other components during the drainage process.
- Winterize Outdoor Faucets: Disconnect garden hoses from outdoor faucets before freezing weather. If the faucet is supplied by a frost-free hose bib, make sure the hose is removed so the faucet can drain properly.
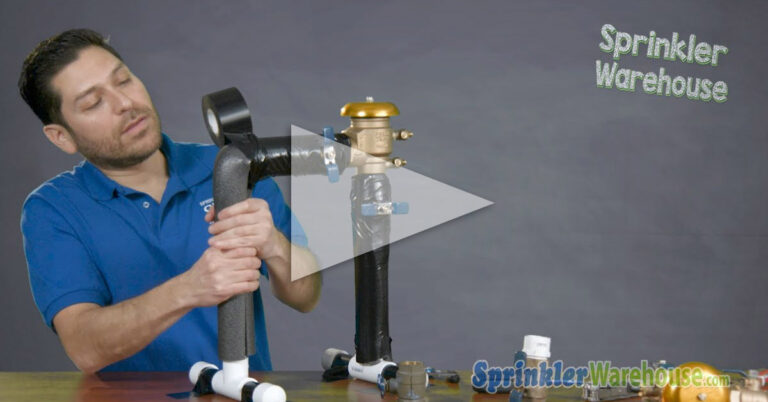
- Insulate Above-Ground Pipe: Wrap exposed irrigation piping with appropriate foam insulation or self-sticking insulating tape. Insulation helps slow heat loss but should not be used as a substitute for draining water from vulnerable plumbing.
- Protect the Backflow Preventer: A backflow insulation cover can help protect a properly drained backflow preventer from freezing temperatures. Keep drain outlets, test cocks, and air vents accessible rather than wrapping the device so tightly that they cannot function or drain.
- Store the Removable Components: If your system allows the backflow preventer or other exposed components to be removed, store them somewhere protected from freezing. Keep the parts together so spring startup is easier.
8: Shut Down and Protect the System
Once every zone and exposed component has been addressed, shut down the system for the season and protect the parts that remain outdoors. A final inspection now can make spring startup faster and help prevent surprises when you turn the irrigation back on.
- Turn Off the Controller: Put an electronic controller in rain mode or turn it off according to the manufacturer’s instructions. Keep your programming intact whenever possible so you do not have to rebuild the watering schedule in spring.
- Cap Open Connections: Place appropriate caps over exposed fittings, backflow preventer risers, anti-siphon valve connections, and other openings that could allow pests or debris into the system. Avoid sealing anything that needs to remain open for drainage or pressure relief.
- Check Insulation: Inspect insulation around exposed pipes and backflow components before the coldest weather arrives. Replace damaged, wet, or missing insulation as needed.
- Keep Notes for Spring: Record which valves were drained, where the compressor connection is located, and whether the backflow preventer was removed. This small amount of preparation can make next year’s sprinkler winterization much easier.
9: Check Your Work and Prepare for the Freeze
Once the system has been drained or blown out, do a final check to make sure no vulnerable components have been overlooked. Proper sprinkler winterization means removing trapped water wherever possible and protecting exposed components before sustained freezing temperatures arrive.
- Check for Trapped Water: Walk through the system and confirm that backflow preventers, valves, sprinkler lines, and other vulnerable components have been properly drained. The goal is to prevent water from freezing, expanding, and damaging irrigation components.
- Protect Exposed Components: Make sure above-ground pipes, valves, and backflow preventers have appropriate protection for your climate. A backflow insulation cover can provide additional protection for a properly drained backflow preventer, while foam insulation can help protect exposed piping.
- Use Compressed Air Carefully: Sprinkler system blowouts require the right compressor, fittings, pressure regulation, and technique. Excessive air pressure or improper equipment can damage pipes and valves or cause flying debris that may result in serious injury.
- Know When to Hire a Professional: If you do not have the equipment or experience needed to safely blow out the system, hire an irrigation professional. Avoid trying to compensate for an undersized compressor by using excessive pressure, which can place severe stress on the irrigation system.
- Prepare for Spring: Keep track of which components were removed, drained, capped, or insulated so you know what needs to be reversed when irrigation season returns. Inspect insulation and exposed plumbing again before spring startup and repair any damage found during the winter.
Protect Your Sprinkler System Before Winter
Winterizing your sprinkler system comes down to one thing: keeping freezing water from damaging your irrigation components. Shut off the water, drain or blow out the lines, protect exposed plumbing and backflow preventers, and make sure the system is ready to sit through the cold months.
Taking these steps before the first hard freeze can help prevent cracked pipes, damaged valves, and costly repairs when spring arrives.
FAQs for Winterizing Sprinkler Systems
Do you really need to winterize a sprinkler system?
If freezing temperatures are common where you live, then yes. Water left in irrigation pipes, valves, backflow preventers, or sprinkler heads can freeze, expand, and damage components, making winterization an important part of seasonal maintenance.
Can I winterize my sprinkler system myself?
Yes, many homeowners can winterize a sprinkler system themselves using manual or automatic drainage methods. A compressed-air blowout requires the right compressor, pressure regulation, fittings, and safety precautions, so consider hiring a professional if you are unfamiliar with the process.
Will sprinklers freeze at 29 degrees?
Water can freeze when temperatures reach 32°F, so 29°F is cold enough for exposed sprinkler components and trapped water to freeze. A brief dip below freezing may not cause damage, but prolonged or repeated freezes increase the risk, especially for above-ground plumbing and backflow preventers.
If you want to stay up-to-date on the latest Sprinkler Warehouse news and make the most of all of our one-of-a-kind promotions, join the Irri-Gator community today. Happy watering, Irri-Gators!