


Irrigation System Design DIY Guide
Designing an irrigation system starts long before you dig a trench or connect a sprinkler head. A good irrigation system design considers your property, water supply, landscape, plants, soil, and hardscape so that you know where to place your new sprinklers, pipes, valves, and controls before digging.
Whether you are designing irrigation for a lawn, garden, shrubs, trees, or a combination of landscape areas, this guide will help you transform your property measurements into a practical DIY irrigation plan.
Table of Contents
9 Steps for Irrigation System Design
Before you start laying out sprinkler heads and pipes, make sure you have the basic information that your design depends on. The following steps walk through the irrigation system design process from measuring your property and water supply to dividing the system into zones and creating a final materials list.
1: Measure and Map Your Property
Start by creating a scaled drawing of the area you want to irrigate. Your map does not need to look professional or artsy, but it should contain enough measurements and landscape details to accurately place sprinklers and route the pipes.
- Measure the Property: Measure the length and width of any areas that will receive irrigation such as your lawn, planting beds, and side yards. Record these dimensions on your sketch for later; that way, you can calculate how to properly space the sprinklers and estimate the length of pipe.
- Mark Permanent Features: Draw the house, garage, sheds, fences, driveways, sidewalks, patios, decks, pools, retaining walls, and any other structures that sprinklers must avoid. Include trees, shrubs, flower beds, gardens, and other planted areas because they can affect both sprinkler placement and watering requirements.
- Create a Scale Drawing: Transfer your measurements to graph paper using a consistent scale such as 1 inch representing 10 or 20 feet. Label the scale clearly so that the distances on the drawing can be converted into real-world measurements when you lay out pipe and sprinkler heads.
- Mark Landscape Areas: Divide the property into logical areas such as front lawn, backyard, side yard, shrub beds, garden beds, and shaded areas. Give each area a simple label such as A, B, C, or D so you can refer to it while designing the zones.
- Mark Sun and Shade: Identify areas that receive full sun, partial shade, or heavy shade throughout the day. These conditions can affect watering requirements and may justify putting different landscape areas on separate irrigation zones.
2: Determine Your Available Water Supply
Your irrigation system can only give as much water as your property can supply at the required pressure. Measure both the water pressure and the water flow before selecting sprinklers or deciding how many heads can operate on one zone.
| What to Measure | Why It Matters | How to Check | Things to Note |
| Water Pressure | Shows the baseline water pressure available before water begins flowing. | Attach a pressure gauge to an outside faucet, preferably near the water meter, and record the pressure with all faucets, appliances, and irrigation fixtures turned off. | Static pressure is a starting point for your design, but sprinkler performance depends on the pressure available while water is flowing through the system. |
| Water Flow | Shows how many gallons per minute (GPM) of water the system can supply to an irrigation zone. | Fill a 5-gallon bucket from an outdoor faucet and record how many seconds it takes, then calculate GPM with 5 gallons ÷ fill time in seconds × 60. | Use the measured GPM when you’re determining zone capacity rather than relying on a general estimate of household water flow. |
| Water Meter Size | Provides useful information about the potential capacity of the water service. | Check the size stamped on the water meter or contact your water utility for the meter specifications. | Residential meters commonly measure 5/8, 3/4, or 1 inch, but meter size should be considered alongside actual pressure, flow, and service-line size. |
| Service Line Size | Helps determine how much water can reach the irrigation system from the water source. | Identify the size and material of the pipe supplying the property, measuring its circumference with string if the pipe is accessible or checking with your water utility. | A smaller service line can limit available flow even when the water meter itself is larger. |
| Well System (If Applicable) | Determines how much water a private well can provide to the irrigation system. | Check the pump’s pressure and flow specifications, along with pressure-tank settings and other well-system information. | Well capacity can vary as the system operates, so account for pump performance and other limitations when determining zone size. |
| Design Capacity | Establishes a practical maximum flow for each irrigation zone. | Use your measured pressure, flow, meter, service-line, and well information to determine how much water each zone can use. | Do not simply match sprinkler GPM to the measured supply. Pressure loss through pipes, valves, fittings, elevation changes, and sprinklers can reduce actual performance. |
3: Identify Irrigation Needs by Landscape Area
Not every part of a property should be watered in exactly the same way. Group areas with similar plants, exposure, soil, and watering requirements so the irrigation system can deliver water more efficiently.
- Separate Plant Types: Identify turfgrass, annual flowers, perennial beds, shrubs, trees, vegetable gardens, and other plantings on your plan. Grass often needs a different watering pattern than individual shrubs or garden plants, while trees may require deeper and less frequent watering.
- Account for Sun Exposure: Separate areas with significantly different sun exposure when practical. A full-sun lawn may need different run times from a shaded lawn, even when both areas use similar sprinkler equipment.
- Consider Soil Type: Note whether the soil is primarily sandy, loamy, or clay-heavy because soil affects how quickly water infiltrates the ground. Clay soils generally absorb water more slowly, while sandy soils allow water to move through more quickly and may require different watering schedules and cycle patterns.
- Mark Slopes and Low Spots: Identify hills, slopes, depressions, and other areas where water may collect or run downhill. Sloped areas may benefit from shorter irrigation cycles, appropriate sprinkler placement, or equipment that helps reduce runoff and low-head drainage.
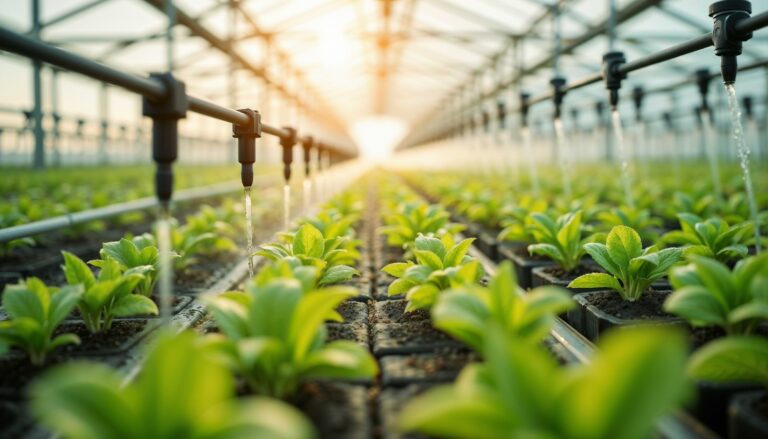
- Separate Drip Areas: Plan separate low-volume irrigation for beds or individual plants when appropriate. Drip tubing, point-source emitters, and micro-sprays can deliver water close to plant roots without applying the same broad spray pattern used for turf.
4: Choose the Right Sprinklers for Each Area
Select sprinkler types based on the size, shape, and watering requirements of each area rather than trying to use the same head everywhere. The goal is to provide complete coverage while keeping precipitation rates reasonably matched within each zone.
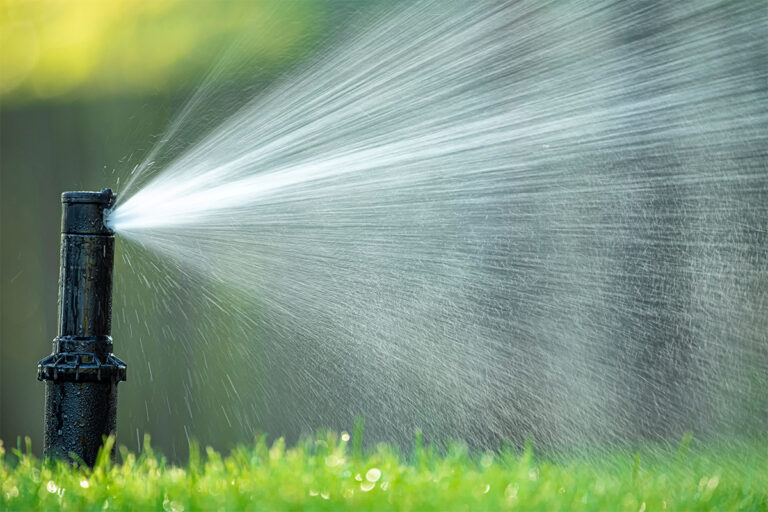
- Use Rotors for Large Areas: Gear-driven rotors are generally suited to larger turf areas because they can cover greater distances than traditional spray heads. Check the manufacturer’s performance chart for the specific radius, arc, pressure, and GPM of the rotor you plan to use.
- Use Spray Heads for Smaller Areas: Fixed sprays and adjustable spray nozzles are useful for smaller lawn areas, narrow strips, and spaces where a shorter radius is appropriate. Choose the nozzle pattern and radius that fit the area rather than allowing the spray to extend onto buildings or hardscape.
- Use Rotary Stream Nozzles: Rotating stream nozzles can provide a useful alternative for some smaller and irregularly shaped areas. Their slower application rate can help in situations where traditional sprays would apply water too quickly for the soil to absorb it.
- Use Specialty Nozzles for Odd Shapes: Adjustable-arc and specialty nozzles can help irrigate corners, narrow strips, and irregular boundaries. Select a pattern that follows the landscape rather than relying on a full-circle spray that sends water outside the intended area.
- Use Micro Irrigation for Plant Beds: Dripline, point-source emitters, bubblers, and micro-sprays can deliver water directly to or near individual plants. These products are especially useful for shrub beds, gardens, containers, and densely planted areas where broad turf sprinklers would waste water.
- Match Sprinkler Performance: Check the manufacturer’s pressure, radius, arc, and flow specifications before placing a sprinkler on your plan. Two sprinklers that look similar can have significantly different water requirements, so use actual performance data rather than estimating GPM from appearance alone.
5: Place Sprinklers for Head-to-Head Coverage
Sprinkler placement determines whether an irrigation system waters evenly or leaves dry spots and over-watered areas. Start with the perimeter and work inward, using the sprinkler’s actual radius and pattern to verify that adjacent heads provide adequate overlap.
- Start With Corners: Place quarter-circle sprinklers at the corners of rectangular lawn areas when their patterns match the boundaries. Draw each sprinkler’s approximate arc on your plan so you can see how far the water will travel before adding additional heads.
- Place Perimeter Heads: Add sprinklers along the edges when corner heads cannot adequately reach one another. Position them so each sprinkler’s spray reaches the next sprinkler across the area, creating the head-to-head coverage needed for more uniform watering.
- Fill Large Areas: Add interior full-circle or appropriately patterned sprinklers when perimeter heads cannot provide complete coverage across the middle of the area. Use the manufacturer’s published radius and precipitation information rather than assuming that a sprinkler will cover a certain distance at every pressure.
- Maintain Head-to-Head Coverage: Design sprinkler spacing so one head reaches the next head across the area whenever practical. This overlap helps compensate for the fact that many sprinklers do not apply water perfectly evenly from the center of their pattern to its outer edge.
- Follow Irregular Boundaries: Break curved or unusual landscape boundaries into manageable sections and use adjustable arcs or specialty nozzles where appropriate. Avoid positioning sprinklers so their normal spray pattern repeatedly waters sidewalks, driveways, buildings, or other areas that do not need irrigation.
- Check Every Radius: Verify each sprinkler’s radius against the dimensions on your scaled drawing before finalizing its location. A head that is only a few feet too far from its target can create a dry strip that becomes obvious once the system is operating.
- Keep Sprinkler Types Consistent: Avoid mixing sprinkler types with substantially different precipitation rates in the same zone. Rotors, sprays, and other sprinklers may have similar GPM requirements while applying water at very different rates over the area they cover.
6: Divide the System Into Irrigation Zones
Most residential water supplies cannot operate every sprinkler on the property simultaneously. Divide the design into zones based on available flow as well as the watering requirements of different landscape areas.
- Calculate Zone Demand: Add the GPM requirements of every sprinkler assigned to an area or potential zone. Compare that total with your available design capacity and keep the zone’s demand within the usable water supply rather than the theoretical maximum.
- Divide High-Demand Areas: If a group of sprinklers requires more water than the system can supply, divide the group into multiple zones. For example, a 16-GPM area supplied by a system with a 10-GPM design capacity would need to be divided rather than operated as one zone.
- Group Similar Sprinklers: Keep sprinklers with similar precipitation rates and watering purposes together whenever possible. A rotor zone should generally not be combined with a small-area spray zone simply because their combined GPM happens to fit within the available water supply.
- Create Hydrozones: Group plants with similar water requirements into the same irrigation zone. Separate high-water-use areas from low-water-use plantings when practical so the controller can run each zone for an appropriate length of time.
- Account for Sun and Shade: Consider separate zones for landscape areas with substantially different exposure. This allows you to adjust watering schedules without applying the same runtime to plants that receive very different amounts of natural moisture.
- Number Each Zone: Label every zone clearly on the design, such as Zone 1, Zone 2, Zone 3, and so on. Carry those same numbers through your valve layout, controller wiring plan, sprinkler locations, and materials list to prevent confusion during installation.
7: Lay Out Valves and Irrigation Pipes
Once sprinkler locations and zones are established, connect each zone to its valve and create the pipe layout. Keep routes practical and direct while accounting for pipe size, flow requirements, access, and future maintenance.
- Locate Valve Manifolds: Place valves where they are accessible for adjustment and repair while keeping them reasonably close to the zones they control. Grouping several valves into a manifold can simplify maintenance and reduce the amount of separate supply piping required.
- Connect Each Zone to a Valve: Every independently controlled irrigation zone needs its own control valve. Mark each valve on your plan and connect it to the corresponding sprinkler zone so there is a clear relationship between the valve, controller station, and sprinkler heads.
- Route Lateral Lines: Draw the pipe connecting the valve to every sprinkler in its zone using a practical route with as few unnecessary turns as possible. Avoid creating complicated loops or long detours that add pipe, fittings, installation time, and potential pressure loss.
- Size Lateral Pipe: Start with the sprinkler farthest from the valve and work back toward the valve while accounting for the flow carried by each section of pipe. Pipe size should be based on the required flow and expected pressure loss, using the manufacturer’s or applicable sizing guidance rather than relying only on the pipe diameter you see most often.
- Plan the Main Line: Connect the point of connection to each valve manifold with the main supply line. The main line will generally need to be sized to carry the combined demand of the system sections it serves without creating excessive pressure loss.
- Choose PVC or Poly Pipe: Select the pipe material appropriate for your region, local practices, soil conditions, and installation method. PVC is rigid and commonly used in many areas, while polyethylene pipe is flexible and can be useful where its installation characteristics suit the property and local practices.
- Plan for Future Expansion: Leave room for potential additions when practical, especially if the landscape may expand later. Extra controller capacity, spare wire, capped pipe stubs, and accessible valve manifolds can make future changes much easier than reopening established landscaping.
8: Plan the Point of Connection and Controls
Your design also needs a clear plan for how the irrigation system will connect to the water supply and how each zone will be controlled. Local requirements are particularly important at the water connection because backflow protection, shutoff valves, plumbing methods, and permits can vary by location.
- Mark the Point of Connection: Identify where the irrigation main line will connect to the property’s water supply. The connection should be planned with enough space for required shutoff and backflow equipment while following local plumbing and irrigation requirements.
- Plan Backflow Protection: Determine what type of backflow prevention device is required for the irrigation system in your area. Requirements can vary by local jurisdiction and water supplier, so verify the approved device and installation method before finalizing the connection.
- Locate the Main Shutoff: Include an accessible shutoff valve that allows the irrigation supply to be isolated for maintenance or repairs. Mark its location clearly on your plan so you can quickly stop irrigation water without shutting down unrelated household plumbing when the system needs service.
- Select the Controller: Choose a controller with enough stations for all planned zones and any reasonable future expansion. Smart and weather-based controllers can provide additional scheduling options, but the basic requirement is that the controller can independently operate every valve in the system.
- Plan Controller Wiring: Allow one control wire for each valve plus a common wire, with additional conductors when future expansion is likely. Measure the actual route from the controller to the farthest valve and include extra length for connections and service loops.
- Consider Sensors: Decide whether a rain, freeze, soil-moisture, weather-based, or flow sensor makes sense for your property. Sensors can help prevent unnecessary watering during rain or freezing conditions, while flow monitoring can help identify unusual water use associated with leaks or broken piping.
- Check Local Requirements: Before purchasing materials or starting excavation, verify permit requirements, utility-marking requirements, backflow rules, and any restrictions on irrigation installation in your area. Contact the appropriate local agencies or utility provider rather than assuming requirements are the same from one location to another.
9: Review the Design and Build Your Materials List
The final design review is where you catch problems before they become excavation problems. Go through the drawing systematically and turn every component shown on the plan into a quantity and size on your materials list.
- Count Sprinklers: Count every rotor, spray body, nozzle, specialty sprinkler, bubbler, or micro-irrigation component shown on the plan. Record the type, radius or application range, arc, and required flow so the selected equipment matches the calculations used to create each zone.
- Measure Pipe: Calculate the length of main line and lateral pipe required for the routes shown on the drawing. Add a reasonable allowance for cuts, connections, routing adjustments, and waste rather than purchasing exactly the measured length.
- Count Fittings: Count tees, elbows, couplings, adapters, reducers, threaded fittings, swing joints, and other connections by size and type. Fittings are easy to overlook because they are not as visually prominent as pipe and sprinkler heads, but missing a few can stop an installation.
- List Valves and Boxes: Record the number and size of control valves along with the valve boxes needed to keep them accessible. Make sure the boxes provide enough room for future maintenance and are positioned where they will not interfere with normal landscape use.
- List Controller and Wire: Match the controller’s station count to the number of zones and record the required length and conductor count for the irrigation wire. Add spare capacity when practical so a future zone does not require replacing the controller or wiring.
- List Water-Supply Components: Include the point-of-connection fittings, shutoff valve, backflow prevention equipment, pressure regulation equipment, and other required components. The exact configuration should follow local codes and the requirements of the water supply rather than a generic parts list.
- Review the Entire Drawing: Trace every zone from the controller to its valve, from the valve through its piping, and from the piping to every sprinkler. Confirm that every landscape area is covered, every sprinkler is connected to a zone, every zone stays within the available water capacity, and no component has been left off the materials list.
Irrigation System Design: Design Before You Dig
A successful irrigation system design gives you a complete picture of the system before installation begins.
Measure the property, establish your available water capacity, identify different landscape needs, select appropriate sprinklers, design for head-to-head coverage, divide the system into manageable zones, size and route the piping, and document every component in a final materials list.
The more carefully you work through the design, the less likely you are to discover problems after the trenches are open.
FAQs for Irrigation System Design
How do I design a home irrigation system?
Start by mapping the property, measuring available water pressure and flow, and identifying areas with different watering needs. Then select appropriate sprinklers, plan head-to-head coverage, divide the system into zones, and size the pipes and valves for each zone.
How many sprinklers can you run off one line?
The number depends on each sprinkler’s flow rate and the system’s available pressure and flow. Add the GPM of every sprinkler on the line and keep the total within the system’s usable design capacity while accounting for pressure loss through pipes, fittings, valves, and elevation changes.
How many sprinklers can a 3/4 pipe handle?
A 3/4-inch pipe does not have one fixed sprinkler capacity because allowable flow depends on pipe material, pipe length, pressure, elevation, and fitting losses. Use the pipe manufacturer’s flow recommendations and sprinkler performance data to determine how many heads the line can reliably supply.
How deep should home irrigation lines be?
Irrigation lines should be installed at a depth that protects the pipe from normal yard activity, freezing conditions where applicable, and potential damage from digging. Local codes and installation requirements should determine the final depth, since requirements vary by location and pipe type.
How many sprinkler zones for 5000 sq ft?
There is no standard number of zones for a 5,000-square-foot property because zone count depends on available water flow, pressure, sprinkler types, and landscape needs. Calculate the total demand of the planned sprinklers and divide them into zones that stay within the system’s usable capacity while keeping similar watering needs together.
If you want to stay up-to-date on the latest Sprinkler Warehouse news and make the most of all of our one-of-a-kind promotions, join the Irri-Gator community today. Happy watering, Irri-Gators!