Today we’re repairing Rain Bird inline valve. Let’s get started! When a valve wears out you don’t necessarily have to cut out and replace the whole valve. You can usually replace the top and internal parts unless the valve body is cracked, or the particular model of valve you’re replacing is no longer available. The solenoid and diaphragm are available for purchase separately for most valves. However, it’s often cheaper and more effective to simply purchase a whole new valve. Which will come with the new diaphragm, solenoid, screws, and spring.
How To Replace The Valve Top
In fact, replacing the valve top, including the diaphragm and solenoid is the method, we at Sprinkler Warehouse recommend. Because the solenoid and diaphragm tend to wear out at about the same rate. If you change just one or the other, you more than likely will be working on this valve again in less than a year. We’ll start by pulling out the valve box. If your valve box is large enough you may be able to work inside the box without removing it. However, it is usually easier to dig out the valve box and get it out of your way.
Here we’re siphoning water out of the hole with a hand pump. It’s a good idea to wipe off the valve to keep dirt and debris out of the irrigation line. Before working on the valve, Turn off the water to your system at the backflow or at the main valve. Relieve the pressure by turning the solenoid one-half turn.
Cut the wires going to the solenoid. Use a screwdriver to back out the screws. Pay attention to which side of the valve the solenoid is on. Remove the old diaphragm. This valve was pretty muddy so we’re cleaning a little bit more.
Examining The Solenoid
Now we’ll remove the top from the new donor valve. This Rain Bird valve has arrows showing the direction of water flow. Pay attention to how this diaphragm is oriented. Carefully remove the diaphragm. Don’t lose the spring. Place the new diaphragm and spring on the old valve, making sure the diaphragm is facing the correct direction.
Now carefully line up the new top on the old valve making sure that the solenoid is on the same side as it was on the top that was removed. Tighten the screws using a screwdriver. Don’t completely tighten them until all the screws are in place. Work in a crisscross pattern. Be careful to not strip the screws. If that happens, you will have to replace the entire valve.
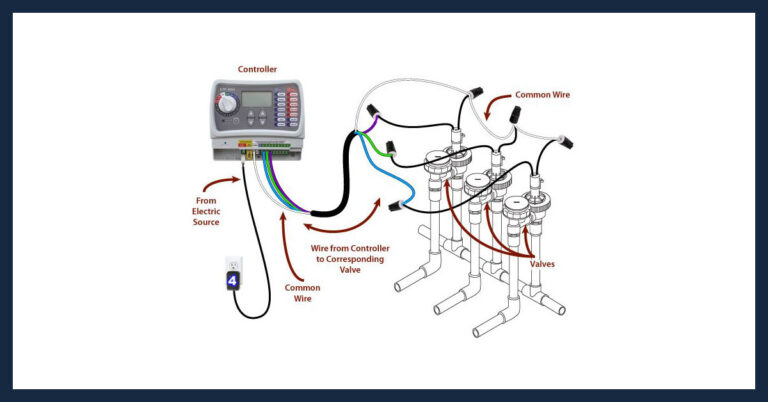
Strip the ends of your wires. Connect one lead from the solenoid to the hot wire. And connect the other lead to the common wire or wires. It does not matter which lead from the solenoid connects to the hot or common wires. Always use waterproof wire connectors. Waterproof wire connectors have silicone inside to prevent water from getting to the wire connections. Replace the valve box. And backfill the hole.
Remember Sprinkler Warehouse has everything for your irrigation needs.
Learn More At Sprinkler Warehouse
So, your trees, lawns, flowerbeds, and Gardens are lush and beautiful. And if you have any questions about our products chat with one of our amazing customer service agents on Sprinkler Warehouse dot com. They really know their stuff and they will get you squared away. Subscribe to our YouTube channel for helpful tips tutorials and general sprinkler instruction. I’m Dwayne Smith for Sprinkler Warehouse. Professional Quality. Rock Bottom Prices!


