Though it seems like a time-wasting ordeal, finding and replacing sprinkler valves is a responsibility every homeowner must tackle to achieve landscape perfection. After years of grass clippings and a thick, luscious lawn has caused your valve box to play hide-and-seek. You could try to find your valves the old-fashioned way with the t-handle probe, but that’s time intensive – and a pain.
How To Find Underground Sprinkler Valves Using The Armada Pro 700
Inside this case, you’ll find the Armada Pro 700 Wire and Sprinkler Valve Locator. This kit includes the Pro 700 transmitter, the locator wand, headphones, a ground spike, and connector leads. This kit is available for rent or purchase from Sprinkler Warehouse.
- Using the Pro 700 Wire and Sprinkler Valve Locator makes finding all of your system’s buried valves and tracing all that underground irrigation wire a breeze.
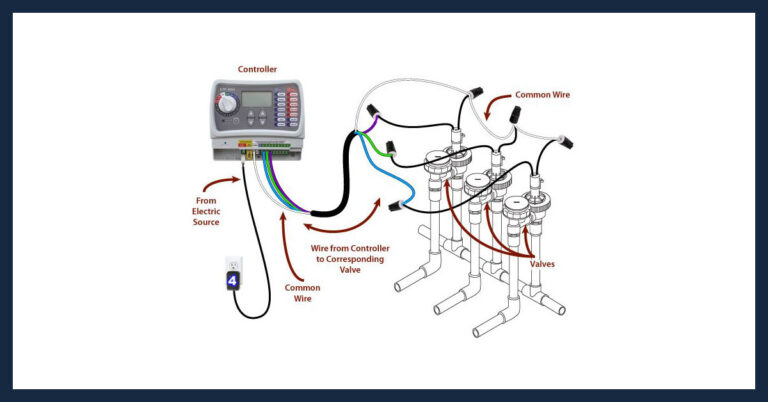
- To find a specific valve in your system, disconnect that zone’s wire from your controller and attach the Pro 700’s positive lead to the transmitter. This will transmit a radio signal in that valve’s wire. Or, to locate all of your irrigation valves at the same time, attach the Pro 700’s transmitter lead to your sprinkler system’s common wire and connect the transmitters black wire to the ground spike. Increase the transmitter signal strength and turn the unit on.
- As you walk the yard, sweep the receiver wand back and forth until you hear beeps from the external speaker. The closer you get to the valve, the louder and faster the beeping becomes.
- Once you think you may have found a valve, place a marker flag before moving on to search for the next valve. Marker flags are also available on Sprinkler Warehouse dot com.
How To Replace Underground Sprinkler Valves
Once you have determined the location of each of your valves, you can go back and dig up the valve boxes. In this install, we are using the Rain Bird 100 DVF NPT valves.
- Screw on the inflow union and attach the inlet unions to the valve’s supply manifold.
- Screw on the outflow union to slip adaptors. These adapters don’t require Teflon tape. But do be careful to not cross thread or over-tighten the assembly.
- Cut the valve wires using wire strippers or snips before cutting out and removing the entire hard piped manifold.
- Water held in place by the pipeline will drain into our work area. So, we’re using a siphon pump to clear the water out. To keep dirt and debris out of the pipeline, Mike inserts paper towels into the open system piping. Always leave some of the paper towel hanging out so you don’t forget it’s there.
- Since the premium manifold is smaller and takes up less space than the hard-piped valves, Mike first test fits the new premium valve manifold and plans out its installation.
- Apply primer and cement on both the PVC and the parts of the manifold that will first be attached. Remember to remove the paper towels from the pipe before attaching the manifold.
- Mike first attaches the manifold to the mainline, then to the lateral, and twists everything a bit to get a good cement bond.
- Wipe off the excess cement outside of the joint to stop any chemical reaction. This preserves the integrity and strength of the PVC pipe. It also makes for a clean professional-looking install.
- Mike attaches the mainline to the open side of the manifold. By overlapping and cutting to length the pipe in place, he’s able to get a precise fit faster than trying to measure and cut the pipe using a PVC pipe cutter before installing it.
- Hold the elbow in place for a few seconds. This allows the chemical reaction created between the primer, cement, and PVC pipe to harden and set. Because the Premium Manifold is smaller than the original hard pipe installation, a bit of design change is needed. However, the next time the valves have to be changed the process will be much easier and faster because the valves won’t have to be cut out and the new ones glued in. Mike is using the Armada Pro 48 to locate the correct valve wire for each valve. For more information on the Pro 48, watch the video titled Troubleshooting Valve Issues located on the videos page at Sprinkler Warehouse dot com. Be sure to use silicon encapsulated waterproof connectors on your valve wires. Here Mike is modifying a new round valve box that fits over a premium manifold.
- All that’s left to do is backfill the hole and replace the sod.
Find Valve Locator Rentals At Sprinkler Warehouse
Remember Sprinkler Warehouse has everything for your irrigation needs. So your trees, lawn, flowerbeds, and Gardens are lush and beautiful. And if you have any questions about our products chat with one of our amazing customer service agents on Sprinkler Warehouse dot com. They really know their stuff and they will get you squared away. Subscribe to our YouTube channel for helpful tips tutorials and general sprinkler instruction. I’m Dwayne Smith for Sprinkler Warehouse. Professional Quality. Rock Bottom prices!


