




Installing Irrigation Barbed Fittings in Micro Tubing
Irrigation barbed fittings (also called “connectors”), make it easy to build secure connections in micro tubing when they’re installed correctly from the start. Using the right technique helps ensure a tight, leak-free seal that keeps water moving efficiently through your drip irrigation system.
A solid connection not only prevents leaks but also improves overall system performance, helping you deliver water exactly where it’s needed while making installation faster and more reliable.
How to Get Reliable Connections with Barbed Connectors
Irrigation barbed fittings—commonly available in ⅛-inch, ¼-inch, and ½-inch sizes—are designed to create a tight, watertight seal inside micro tubing without requiring clamps or adhesives.
Whether you’re building a new system or expanding an existing one, understanding the different installation methods helps you make durable connections that last season after season.
1: Install Irrigation Barbed Fittings by Hand
For softer tubing or warm weather installations, inserting a drip irrigation barb connector by hand is often all you need. Taking your time prevents damage while ensuring the fitting seats completely.
- Inspect the Tubing: Make sure the tubing end is cut cleanly and free from cracks or debris.
- Grip the Connector Firmly: Hold the connector close to the barbed end for better control.
- Twist While Pushing: Rotate the connector as you apply steady pressure until the barbs are fully inserted.
- Check the Fit: Confirm the tubing reaches the fitting’s shoulder without gaps.
2: Soften the Tubing Before Installation
Rigid tubing can make installing a barbed fitting in drip irrigation more difficult. Softening the material reduces the force needed and minimizes the risk of splitting the tubing.
- Use Warm Water: Dip the tubing end into warm—not boiling—water for several seconds.
- Improve Flexibility: The softened tubing stretches more easily over the barbs.
- Insert Immediately: Install the connector before the tubing cools and stiffens.
- Allow to Cool: Once cooled, the tubing contracts around the barbs for a tighter seal.
3: Use a DIG Drip Punch Insertion Tool
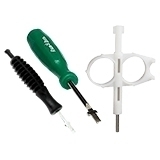
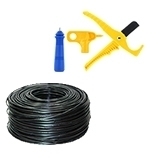
For larger projects or frequent installations, the DIG Drip Punch Insertion Tool simplifies the process while reducing hand fatigue. It combines punching and insertion functions into one convenient tool.
- Align the Connector: Position the barb properly before applying pressure.
- Apply Even Force: The tool helps seat the connector without excessive twisting.
- Reduce Hand Strain: Repetitive installations become faster and more comfortable.
- Increase Consistency: Each connection is inserted to a similar depth for reliable performance.
4: Test Every Connection
Proper installation isn’t complete until each fitting has been checked under pressure. A quick inspection helps catch small issues before they become leaks.
- Turn On the Water: Pressurize the system gradually.
- Inspect for Leaks: Watch each connector for dripping or spraying water.
- Push Further If Needed: Slightly reseat any loose fittings.
- Replace Damaged Parts: Swap out cracked tubing or worn connectors immediately.
Irrigation Barbed Fitting Installation Methods
Choosing the right installation method depends on your tubing, project size, and available tools. This quick comparison highlights when each approach works best.
| Installation Method | Best For | Advantages | Considerations |
| Hand Installation | Small repairs | Fast and simple | Requires hand strength |
| Warm Water Method | Stiff tubing | Easier insertion | Adds an extra preparation step |
| DIG Drip Punch Insertion Tool | Large installations | Faster, more consistent connections | Requires a specialized tool |
| Pressure Testing | Every installation | Verifies leak-free performance | Should always be performed |
Irrigation Barbed Fittings: Finish Your Drip System with Confidence
Installing barb connectors correctly helps your drip irrigation system perform efficiently while minimizing leaks and maintenance.
Whether you insert fittings by hand, soften the tubing first, or use the DIG Drip Punch Insertion Tool, taking a careful, consistent approach creates dependable connections that keep water flowing exactly where it’s needed.
FAQs for Irrigation Barbed Fittings
What are the different types of barb fittings?
Barb fittings come in several variations depending on how they’re used in a system. Common types include straight connectors for joining two sections of tubing, elbows for making 90-degree turns, tees for branching lines, and couplers for extending runs. You’ll also find reducing barb fittings that connect different tubing sizes and end caps used to close off the line.
Do I really need hose clamps for barb fittings?
In most low-pressure drip irrigation systems, hose clamps are not required when using properly sized barbed fittings and flexible micro tubing. The barb is designed to grip the inside of the tubing and create a tight seal on its own. However, clamps can be helpful in higher-pressure situations, with oversized tubing, or if the tubing has become stiff or worn over time.
Are barb fittings better than compression?
Barb fittings and compression fittings both have their place, but neither is universally “better.” Barb fittings are typically easier to install, more cost-effective, and widely used in drip irrigation and micro tubing systems. Compression fittings, on the other hand, provide a very secure mechanical grip and are often preferred in applications where higher pressure or extra durability is needed.