Everything You Need To Know About Rain Bird’s TM2 Controller
If you’re looking for a controller for your home or small business the Rain Bird TM2 is loaded with features. I’m Dwayne Smith, your Sprinkler Warehouse Product specialist. Let’s talk about TM2.
How To Program Your Own Start Time
If you need a controller that has 12 or fewer zones, Rain Bird’s TM2 has got you covered. It’s an indoor/outdoor controller with all the features you’d expect. It comes in 4, 6, 8, and 12-station models. If I were you, I’d buy one with at least a couple more zones than you think you need in case you want to add a zone to your landscape later. You can have 3 separate programs and each program can have up to 4 start times. That gives you plenty of flexibility for your watering schedule.
Why would you have 3 separate programs? Maybe the plants in one section of your landscape will need watered every day or every other day while in other sections of your landscape you’ll water them once a week. Additionally, with four start times per program, you can set your controller to split up watering to allow the water to soak in or you can water both in the morning and in the evening.
Top Features & Components
- You can attach a rain sensor or a rain and freeze sensor sold separately. This prevents unnecessary watering. For example, if it’s raining your sprinkler system won’t turn on.
- The TM2 does not have the ability to add a flow sensor. If you want a flow sensor, you’ll want to check out the ESP-ME3.
- The TM2 has a nonvolatile memory, so if you lose power you won’t have to reprogram the controller.
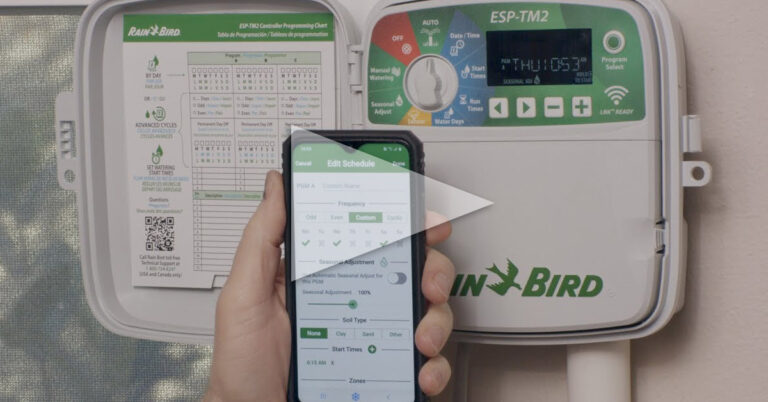
- My very favorite feature about this controller is the ability to upgrade it by adding WiFi. With the LNK WiFi system, you are essentially turning this into a smart controller.
Integrated App For Total Control Of Your Sprinkler System
The LNK WiFi system allows you to run the controller from the Rain Bird app. From the app, you can program the controller, start and stop watering, and most importantly, set up automatic watering adjustments based on local weather reports. This can set you up for some serious savings on your water bill. You can even operate your sprinkler system with Alexa or Google Home.
Let’s do a brief overview of the interface.
- The offsetting. No watering occurs when the dial is set here. If the watering is currently happening this will turn it off.
- Auto is the default position. Programming will occur as normal. All programs that have a start time specified will run at the appropriate time.
- Date and time. This is where you set the current date and time. Of course.
- Start times. You set the start times for each program here. The 1st, 2nd, 3rd, and 4th here refer to the start times for a program, this is not the start times for each station. Stations will run sequentially. Each program can have up to four start times. For example, it says Program A here. If I set 1st to 7 a.m., it’s going to run all of program A once at 7 a.m. If I have a second start time at 9 a.m. then it will run all of program A at 9 a.m. You change programs with this button over here.
- Run times. This is how long each station is set to water. You’ll want to adjust that depending on the needs specific to each zone, whether it’s your lawn or your flowerbeds, etc. Once again, this is program A. So maybe in program A I only want zone one to run. But in program B I want all zones to run. And maybe program A is every day and program B is 3 times a week. However, you want to do it.
Customize Your Watering Days
By default, it’s ready to program for days of the week. Use the Plus and minus signs to turn each day on or off or you can run your programs by cycles, which means every so many day. Press the arrow key until you see this screen. You can set it to water every other day, every third day all the way to every 31st day. And adjust how many days you want with the plus or minus sign. Days remaining are how many days before the controller will start the cycle.
There’s also a hidden function here. If you press and hold both arrow keys you can choose odd or even days if that’s your preference. If you’re running the cycles function or the odd or even days function you can permanently turn off certain days of the week. For example, maybe your lawn guys mow every Tuesday.
Here’s how you do that: With the dial set to Water days, choose the correct program you want to prevent watering. And hold the program select button until you see “PERMOFF”. Use the minus key to turn off any day that you don’t want this particular program to water.
Once again, these settings are per program, so you could set program A on odd days and B on even days, and C on Fridays. It’s incredibly flexible.
- Sensor. If you have a sensor attached, here is where you can choose to have the controller ignore the sensor if you want. By default, it’s set to active. This means it will stop watering if the sensor tells it to.
- Seasonal Adjustment. This allows you to keep the same watering schedule but reduces or increases how long you water by percentage. You can water as little as 5 percent of the scheduled watering time all the way to 200 percent. And you can set this per program A B or C as well.
- Manual programming allows you to run one program or even just one station right now.
- Delay Watering function. If you want to delay watering for several days, turn the dial to Auto. Press and hold the plus key until you see the word Delay. From there you can decide how long to wait before the program resumes, up to 14 days.
To add LNK WiFi, remove this cover and insert the module here. You can download the free Rain Bird app from Google Play or the App Store. We’ll do an overview of the very powerful Rain Bird app in another video.
That’s the Rain Bird TM2. It will help you keep your landscape healthy and happy for years to come. Order yours today on sprinklerwarehouse.com.


