Keep Your Sprinkler System Healthy in Frigid Weather
This article explains how to winterize in cold climates using a variety of methods. Winterization is an important part of maintaining a properly running lawn sprinkler system. Where you live plays a big part in which steps you will need to follow. If you live in a region that is temperate/moderate, it either never freezes or only freezes for an hour or two at a time. When it does freeze there are far fewer steps involved when it is time to winterize your irrigation system.
Do you experience freezing? Do you have icicles hanging from your house? How about shoveling snow? If so you definitely live in a Cold Climate area and will need to follow the winterization steps entirely.
Three Methods When Winterizing Your Irrigation System:
- Manual Drain Valve Method
- Automatic Drain Valve Method
- Blow Out Method
*A Note About Backflow Preventers:
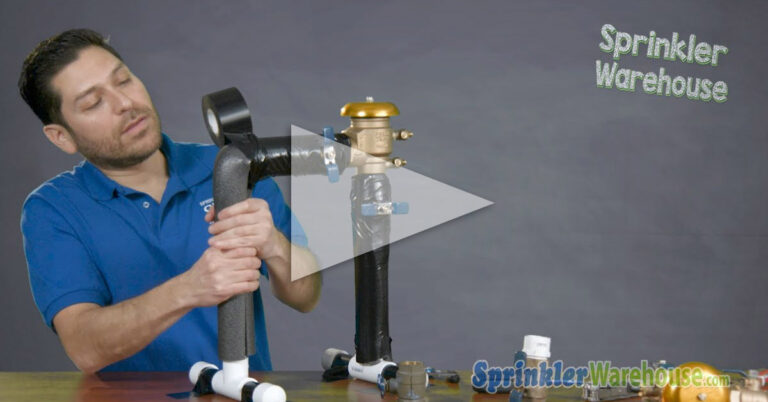
- No matter what climate you live in, you can make winterization easier by insulating your irrigation system’s backflow preventer.
- In cold climates, occasional late and early season freezes occur and can damage your equipment. Using a small amount of self-sticking foam insulating tape should be sufficient. Be sure to avoid blocking the drain outlets or the air vents.
- Otherwise, try using some R-11 fiberglass insulation. Wrap it around the backflow preventer, then use duct tape to secure a plastic bag around the whole thing.
- Don’t secure it too tightly – just tight enough to keep it from blowing off.
Shop for backflow preventers, insulated pouches, winterizing valves, repair parts, and more
Before Beginning To Winterize In Cold Climates:
Turn Off The Water:
Completely turn off the water supply to your system. You will need to turn off the main shut-off valve and make sure that it is protected. Make sure that your main sprinkler system valve is in an area where it can’t freeze.
Shut Down The Irrigation Controller:
- If you have an automatic controller then turn the controller to either rain mode or off. This will allow all of your programming to stay intact. This also keeps you from having to reprogram your controller in the spring.
- If you have a mechanical controller you will need to completely unplug the controller. Mechanical controllers use a lot of unnecessary electricity if left plugged in.
Drain Water:
- Next, you will need to remove the backflow preventer from your lawn sprinkler system. Once it’s removed, drain all the water from it and store it someplace safe. Although you can always re-install it once it’s drained, that’s usually a task best kept for the springtime.
- There’s a chance that you’ll be able to siphon water out of your irrigation system’s risers. However, it is more likely that you’ll have to pump it out. If so, a wet/dry shop vacuum is your best option; use duct tape to make the hose narrow enough to work properly.
- Valves that are installed above ground should be drained of water and stored somewhere safe. Some people choose to use pipe heating cables on their backflow preventers and above-ground valves. Keep in mind, that even when used properly these arrangements can be affected by power outages. Other serious damages can also affect your irrigation system.
Removing A Backflow Preventer:
- Removing your irrigation system’s backflow preventer and storing it for the season is a smart move when you’re completing the other steps involved in winterization.
- How do you remove a backflow preventer though? With any luck, the one that you have is held in place with union connections. In this case, you’ll just need to uncouple them on either end of the backflow preventer, just before the bends in the piping.
- Once it’s removed, storing it will be simple. You can use insulation on the exposed ends of the pipe to keep them safe from harm. It also keeps critters and debris from inadvertently getting in.
- If you don’t have union connections in place, though, you’re in for a little bit more work. The people who have the biggest trouble removing their backflow preventers are the ones whose system doesn’t use union connections.
- In this case, you’ll have to cut the backflow preventer out manually. It’s definitely more work, but the good news is that once that’s done, it’s done.
- When spring rolls back around, you can re-install the backflow preventer for your irrigation system using union connections; the next time you need to winterize your lawn sprinkler system, it will be considerably easier.
Insulate Your Backflow Device:
- The most important step of the winterization process: removing all of the water from the system’s pipes and sprinklers so that it doesn’t freeze, expand, and burst everything.
- There are a few different ways of approaching the problem. You can use a shop vacuum to suck all of the water out (a very time-consuming and aggravating process). You could also drain the water out via the system’s drain valves. Another option is to use air to blow all of the water out (sprinkler system blow out)
Choose A Method Below To Winterize In Cold Climates:
Now you will need to decide whether you need to use the Manual Drain Valve Method, the Automatic Drain Valve Method, or the Blow Out Method.
1. Manual Drain Valve Method:
- This method is required if your manual drain valve is located at the lowest point. Your manual valve will either be a ball valve, stop and waste valve, or a globe valve.
- Make sure that after the water has drained out of the mainline you drain the water that is between the shut-off valve and the backflow device. This will not remove the water from your backflow device or your sprinklers.
- Open the test cocks on your backflow device to enable the water to flow out. If your sprinklers have check valves make sure to raise them so that the water drains out.
2. Automatic Drain Method:
- Drain Valves are typically located on the ends and low points of your sprinkler system. They drain the water when the PSI is below 10PSI.
- Activate a station to release pressure and to get the automatic drain valves going. This method saves a great deal of frustration. As with the other methods you will need to drain the water out of the backflow device and your sprinkler heads.
- In some instances, you might have both a manual and an automatic drain valve. If this is the case you have to follow the above method for manual drain valves as well.
3. Blow Out Method:
Although we will be outlining how a sprinkler system blowout works, it is best to have a professional perform this kind of work for you. In fact, hiring a professional to conduct winterization work is the best way to go, if possible.
CAUTION! WEAR PROPER EYE PROTECTION!
Extreme care must be taken when blowing out the system to avoid excessive pressure which can damage valves or sprinkler pipes or cause physical injury due to flying debris.
Do not stand over any irrigation components (pipes, sprinklers, and valves) during air blowout. Air pressure must not exceed 50 pounds per square inch (psi) for systems with polyethylene piping, and 80 psi for systems with PVC piping.
- Get The Right Equipment – To conduct a sprinkler system blowout, you will need a very large air compressor.
- To obtain proper air volume, you will need to rent or buy a compressor capable of providing 80 to 100 cubic feet per minute (CFM) of air volume. At a minimum, you should use a 50 cubic feet per minute compressor to get the job done right. Anything smaller will make the job inefficient – and may even make it impossible.
- Make sure the compressor has a pressure regulator valve with an accurate gauge.
- If possible, try renting different sizes and kinds of air compressors until finding one that works the best – then purchase it so you don’t have to rent it again every time you winterize.
If the appropriate air compressor is not available, please call an irrigation contractor. Do not try to use an air compressor with high pressure (120 psi) and low volume to evacuate water from the system. It is not an acceptable practice to allow the compressor to fill the holding tank of the compressor and the closed mainline with high-pressure air, hoping the surge of excess pressure will compensate for the lack of compressor size and blow the line clean upon opening the sprinkler control valve. This is a dangerous practice that places very severe stress on all of the components of the system.
Do not run the compressor without at least one sprinkler control valve open. This lessens the chance that the system could over-pressurize. It is a common misbelief that if the system can withstand 120 psi of water pressure, similar air pressure will not damage the system. This is not true! The viscosity of air is much lower than water, generating much higher stresses that can cause severe damage to the system.
This is a dangerous practice that places very severe stress on all of the components of the system. Do not run the compressor without at least one sprinkler control valve open. This lessens the chance that the system could over-pressurize. It is a common misbelief that if the system can withstand 120 psi of water pressure, similar air pressure will not damage the system. This is not true! The viscosity of air is much lower than water, generating much higher stresses that can cause severe damage to the system.
- Remove The Backflow Preventer – Most likely (and preferably) your backflow preventer will be located just after the irrigation shut-off valve for your lawn sprinkler system. If you have an anti-siphon valve, remove the whole valve.
- Connect The Air Compressor – On the downstream side of the system, connect the air compressor to the backflow preventer riser.
- Turn On The Valves – Always turn on your valves one by one, using the automatic controller, when you blow out the sprinkler system. Begin with the last valve – or the one at the highest elevation. Open manual valves by hand. If you’ve removed the anti-siphon valves, you will need to connect the compressor hose to the downstream part of the valve risers.
- Turn On The Air Compressor – With this step, taking your time is key! Gradually increase the pressure without letting it exceed 50 psi. If the air coming out of the air compressor becomes dangerously hot, you may need to install a length of hose between it and the sprinkler system connection, so be prepared.
- Blow The Water Out – Keeping a close eye on the air pressure and temperature, allow the water to blow out. The first valve will generally take the longest; after that, things should proceed rather quickly. Don’t allow air to blow out any longer than necessary – i.e., as soon as the water has been effectively blown out, turn off the air compressor.
- Move On To The Next Valve – Turn off the valve that you just worked on, and proceed to the next one following the same steps. Repeat the same sprinkler system blowout as outlined above on each of the valve circuits; with anti-siphon valves, remember to move the air compressor onto the next valve riser.
- Repeat The Entire Process – For optimal results, perform the exact same blow-out sprinkler system process again. Warning: do not turn off all the valves when the compressor is running – it could blow up your lawn sprinkler system.
- Blow Out Main Line Section – If your irrigation system has a mainline section that is upstream from the backflow preventer, hook up your air compressor to the blow-out fitting near the sprinkler system shut-off valve; blow out the water through the backflow preventer riser.
- Tie Up Loose Ends – When the sprinkler system blowout is complete, set the automatic controller to “rain mode” or disconnect power from it. Place threaded caps over the anti-siphon valve fittings, backflow preventer risers – over anything that might allow pests or garbage to get in.
- Turn the Controller / Timer Off
Connecting The Air Compressor To The Backflow Preventer Riser:
- If you’ve never connected an air compressor to the backflow preventer riser on your irrigation system before, it’s important to learn. Otherwise, winterization via blowing out the system will be impossible.
- Most of the time, you just need to look for a hose tap, quick coupler, or hose bib that is after your irrigation shutoff valve and backflow preventer.
- You can connect your air compressor hose to this for the easiest, most straightforward time. If there is no tap or other convenient option present, install a tee fitting just past the mainline.
- Then put a threaded metal nipple and cap on the extra leg; you can use this as a connection to the air hose.
- You’ll want to use a metal nipple and cap because the pipe can get very hot at the point of the connection due to the speed at which the air is being blown.
- Most of the time, you just need to look for a hose tap, quick coupler, or hose bib that is after your irrigation shutoff valve and backflow preventer.
- You can connect your air compressor hose to this for the easiest, most straightforward time. If there is no tap or other convenient option present, install a tee fitting just past the mainline. Then put a threaded metal nipple and cap on the extra leg; you can use this as a connection to the air hose.
- You’ll want to use a metal nipple and cap because the pipe can get very hot at the point of the connection due to the speed at which the air is being blown.
- Connecting the compressor air hose to the nipple and cap end of the tee fitting isn’t always a cut and dry procedure.it usually requires a bit of ingenuity, and the precise size fitting that you will need to connect the compressor hose to the tee fitting depends on the model of air compressor you’re using and other variables. It’s safe to assume that a standard fitting won’t do the job; a bit of trial and error is usually necessary.
- Once the right fitting is found, though, it’s as simple as screwing the air compressor hose onto the tee fitting. The threads from the tee fitting should fit with the threads on the metal nipple – that will be your ultimate goal, anyway.
- Otherwise, another way of going about this process is unscrewing one of the test cocks and threading a male air hose fitting onto it. Simply attach the female end of the air hose to the male end of the line and you’ll be good to go. A bit of trial and error is something necessary when the time to winterize rolls around, so don’t be surprised if you have to make several trips to the hardware store to get everything working the right way. Be sure to organize all of the equipment and tools that you use to make the process easier next year.
Practice Makes Perfect To Properly Winterize In Cold Climates:
The article above demonstrates how to winterize in cold climates and it’s easy to see that it doesn’t have to be an impossible task. Doing it yourself can save you a great deal of money, and with every passing season, you will become more skilled at it. Having the right equipment and parts can also help tremendously; you can find the best controllers/timers here. Remember that once you’ve insulated all of your pipes and backflow preventers properly, you will be set for some time and won’t need to repeat the process every single year.
Make sure that all of the above-ground piping is insulated. Unlike the buried pipe it doesn’t have the ground to keep it insulated and it is exposed to the elements. Self-sticking insulating foam tape works best to insulate these pipes. You can also use foam insulating tubes just cut the tubes to size and wrap them around your pipes.
At the end of your coldest season, you can opt to leave the insulation intact. Just make sure at the beginning of the season next year you do a run-through and check for damaged insulation and make touch-ups as needed.