Table of Contents
A Guide To Winterizing Your PVB
Just as you prepare your home and car for cold weather, your irrigation system also needs attention. Cold temperatures can be damaging to backflow preventers, like pressure vacuum breakers, because any water left inside can freeze and expand. This expansion can crack the brass body, damage internal valves, and cause leaks that aren’t easy to repair. Backflow winterization is the process of protecting these devices from freezing by draining residual water and insulating the unit to prevent freezing. Proper winterization ensures the backflow preventer remains intact during cold months, preserving both its functionality and the safety of your irrigation system. Let’s review how to winterize PVB valves in a few simple steps.
Step 1: Turn off the Isolation Valve
Start by locating and shutting off the isolation valve that controls the flow of water to your irrigation system. This valve can usually be found on the main water supply line leading to the PVB. Turn the handle clockwise until it’s fully closed. This step ensures that water is no longer feeding into the PVB or irrigation lines during the winter season. If water continues to flow into the system when temperatures drop, it can freeze inside the PVB. Since water expands as it freezes, this can crack the brass body of the backflow preventer or rupture other internal components. By shutting off the isolation valve, it’s easier to safely drain and protect the system from freezing damage.
Step 2: Opening the Test Cocks
Locate one or two small test cocks on the body of your PVB. Using a flathead screwdriver, turn each test cock to open it slightly. This allows trapped water to drain from inside the PVB and relieves pressure within the device. You may see a little water dribble out. As we just mentioned, if water stays trapped inside the PVB during freezing weather, even a tiny amount can expand enough to cause hairline cracks in the body. Luckily, test cocks act as small release valves. By opening the test cocks, you’re giving any remaining water a way to escape and ensuring there’s no pressure buildup inside the unit.
Step 3: Turn off the PVB Valve Handles to 45°
Most PVBs have one or two larger ball valve handles: one on the inlet side and one on the outlet side. Once the system has been shut off and drained, turn each of these handles so that they are positioned halfway between “open” and “closed,” or at about a 45° angle. Leaving the handles in a fully open or fully closed position can trap small amounts of water inside the ball of the valve. If that water freezes, it can expand and crack the valve internally. Setting the handles to 45° leaves enough space for any remaining moisture to expand without causing damage. It also relieves pressure on the seals, which can extend the life of the valve.
Step 4: Insulate Your PVB
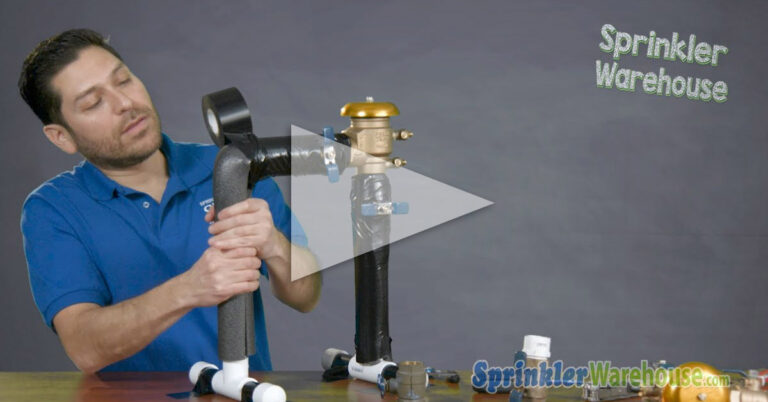
Once the device has been shut down and drained, wrap it with insulation to further protect it from freezing temperatures. You can use foam pipe insulation, an insulated PVB cover, or even a combination of foam wrap and a waterproof bag. Be sure the insulation is snug but not overly tight, and secure it with weather-resistant tape or straps. The key is to keep the PVB dry while preventing heat loss during cold nights. Even after draining, a PVB can be vulnerable to freezing, especially if exposed to wind or snow. Insulation acts as a protective blanket, reducing the risk of residual water freezing inside and protecting the brass body from harsh weather. Many homeowners make the mistake of only shutting off the valve but skipping insulation. Unfortunately, this may still lead to cracked PVBs when spring arrives. A few extra minutes to properly insulate the unit can save hundreds of dollars in replacement or repair costs.
Winterizing your pressure vacuum breaker may only take a few minutes, but it can save you from expensive repairs and headaches when spring arrives. By following each of the steps above, you’re giving your PVB the best protection against freezing temperatures. These small steps go a long way in preventing cracked valves and costly replacements. Backflow preventer winterization is simple and requires practically no equipment. With proper winterization, your backflow preventer will be safe and ready to perform when it’s time to water again in the spring.
FAQs
Do I need to winterize my backflow preventer?
You absolutely need to winterize your backflow preventer, especially if you live in an area that experiences freezing temperatures. Water trapped inside the device can freeze, expand, and cause the backflow preventer’s internal components to crack or rupture. Even minor damage can lead to costly repairs. Backflow winterization can extend the lifespan of your device and keep your irrigation system ready for spring.
What happens if a backflow preventer freezes?
If a backflow preventer freezes, the water inside expands as it turns to ice, which can crack the brass body. This damage often goes unnoticed until the system is pressurized again, leading to leaks, flooding, or a complete failure of the backflow preventer. Not only can this be expensive to repair, but it also leaves your water supply unprotected from contamination. Backflow winterizing helps you avoid these risks.
How do I replace a broken PVB?
If your PVB freezes and cracks over the winter, you may need to buy a new one to ensure that your home water supply is protected from backflow. At Sprinkler Warehouse, you can shop from a wide variety of backflow preventers, including several different types of Pressure Vacuum Breakers. To replace the broken PVB, start by shutting off the water supply and relieving pressure from the system. After that, you can add the new device by following the manufacturer’s guidelines.


