



How to Use a Bonnet and Poppet Repair Kit to Fix a Backflow Preventer
Replacing a backflow preventer bonnet and poppet can restore a pressure vacuum breaker (PVB) that has damaged or worn internal parts.
If the rest of the device is in good condition, replacing these components may be an alternative to installing an entirely new backflow preventer. Before starting, identify your device, shut off the water supply, and make sure you have the correct replacement kit.
Table of Contents
How to Replace a Backflow Preventer Bonnet and Poppet in 8 Steps
A bonnet and poppet replacement involves removing the old plastic components, clearing broken pieces from the valve body, and installing a compatible repair kit.
The following steps focus on pressure vacuum breakers, including some commonly called sprinkler bell valves because of their bell-shaped bonnet assemblies. Always follow the manufacturer’s instructions for your specific model, since internal designs and replacement procedures can vary.
1: Identify the Backflow Preventer and Buy the Correct Repair Kit
Before taking apart the device, confirm that it uses a replaceable bonnet and poppet assembly. A compatible bonnet and poppet repair kit should match the backflow preventer’s manufacturer, model, and size.
- Check the Model Number: Look for the manufacturer’s name, model number, and size on the backflow preventer body or product label. For example, a FEBco 765 pressure vacuum breaker requires a repair kit specifically compatible with that model and its configuration.
- Inspect the Damaged Parts: Look for a cracked bonnet, broken plastic pieces, or other visible damage around the assembly. If the valve body is cracked, the metal components are badly corroded, or the device has other major damage, replacing the entire assembly may be necessary.
- Match the Replacement Kit: Compare the kit’s compatibility information with your existing device before purchasing. A FEBco repair kit 765 may be appropriate for a compatible FEBco 765 model, but verify the exact model and kit specifications before installation.
2: Shut Off the Water Supply
Water pressure must be relieved before you remove the bonnet and poppet assembly. Closing the correct valve and following the manufacturer’s shutdown procedure helps prevent unexpected water discharge or injury.
- Close the Shutoff Valve: Turn the appropriate upstream shutoff valve to the closed position, following the device manufacturer’s instructions. Do not assume that turning the bottom valve handle clockwise is correct for every installation; verify the valve’s operating direction.
- Relieve Pressure Safely: Follow the manufacturer’s procedure for relieving trapped pressure before loosening the bonnet. Water may remain inside the assembly even after the supply is shut off, so position yourself to avoid being sprayed when opening the device.
- Confirm the Supply Is Off: Make sure the water supply remains isolated before continuing. If you cannot safely shut off or depressurize the device, stop and contact a qualified irrigation professional.

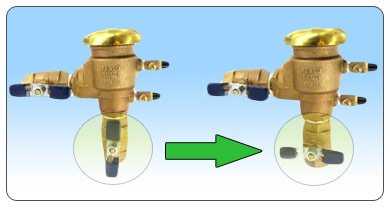
Shut Off Bottom Valve Handle. Turn To The Right.
3: Remove the Old Bonnet and Poppet
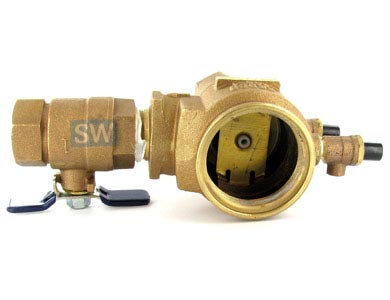
Once the device is depressurized, remove the damaged bonnet and any accessible broken plastic pieces. Work carefully because internal components may contain springs or other parts that can move unexpectedly.
- Unscrew the Bonnet: Remove the bonnet according to the manufacturer’s instructions, using the recommended method and tools. Avoid forcing a stuck component or damaging the threads on the valve body.
- Remove Loose Plastic Pieces: Carefully collect broken bonnet or poppet fragments that are accessible from the opening. Do not leave loose plastic inside the valve, where it could interfere with operation or prevent the new parts from seating correctly.
- Leave Other Internal Parts Alone: Do not remove the metal component or spring-loaded parts at the bottom of the valve unless the manufacturer specifically directs you to do so. These components may be under spring tension and can cause injury if released unexpectedly.

4: Inspect and Clean the Valve Body
Before installing the replacement kit, check the exposed area for debris and damage. A clean, undamaged seating surface helps the new components fit correctly.
- Check for Remaining Debris: Inspect the accessible interior and remove loose fragments without pushing them farther into the valve. Use only cleaning methods and tools approved by the manufacturer.
- Inspect the Threads and Seating Surfaces: Look for cracks, stripped threads, corrosion, or damage that could prevent the replacement bonnet from sealing properly. If the valve body or critical internal components are damaged, stop and determine whether additional repairs or full replacement are needed.
- Avoid Unapproved Disassembly: Do not dismantle the valve beyond the steps specified for your model. If broken pieces are trapped around spring-loaded components or cannot be removed safely, have a qualified technician finish the repair.
5: Install the New Bonnet and Poppet
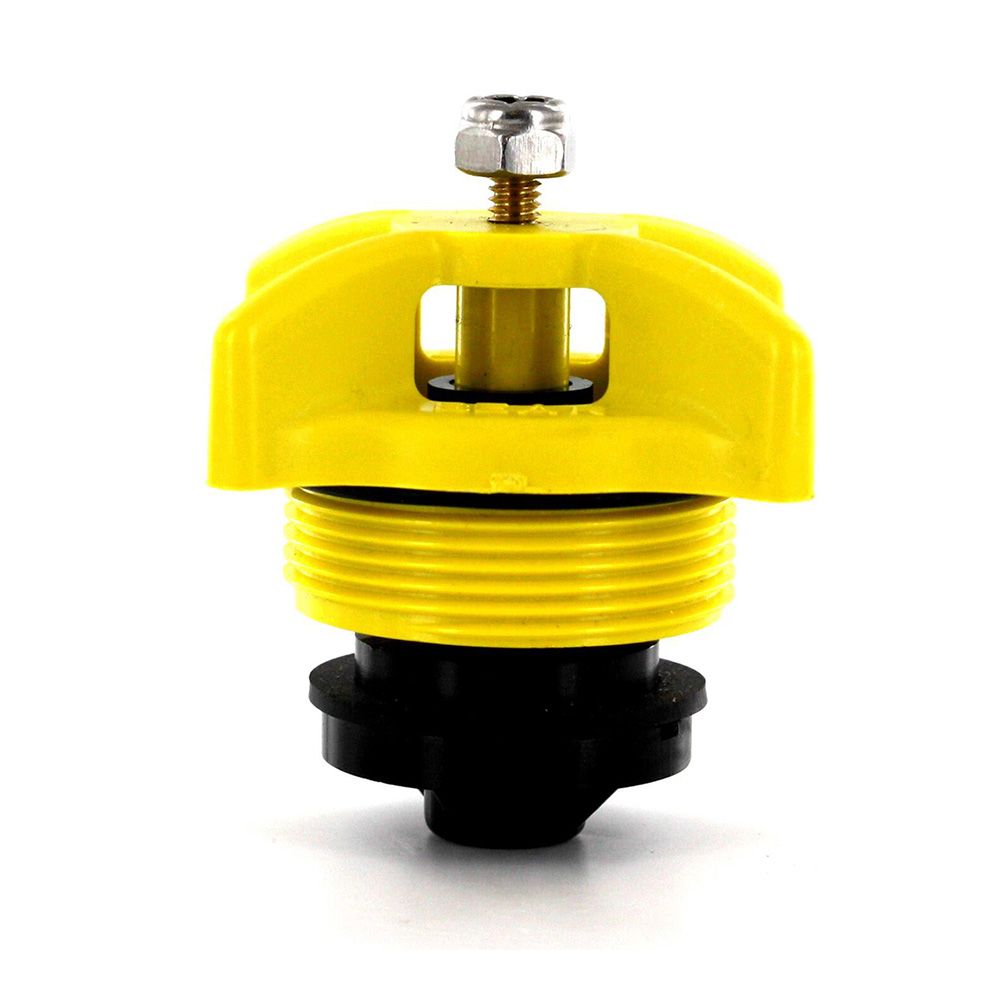
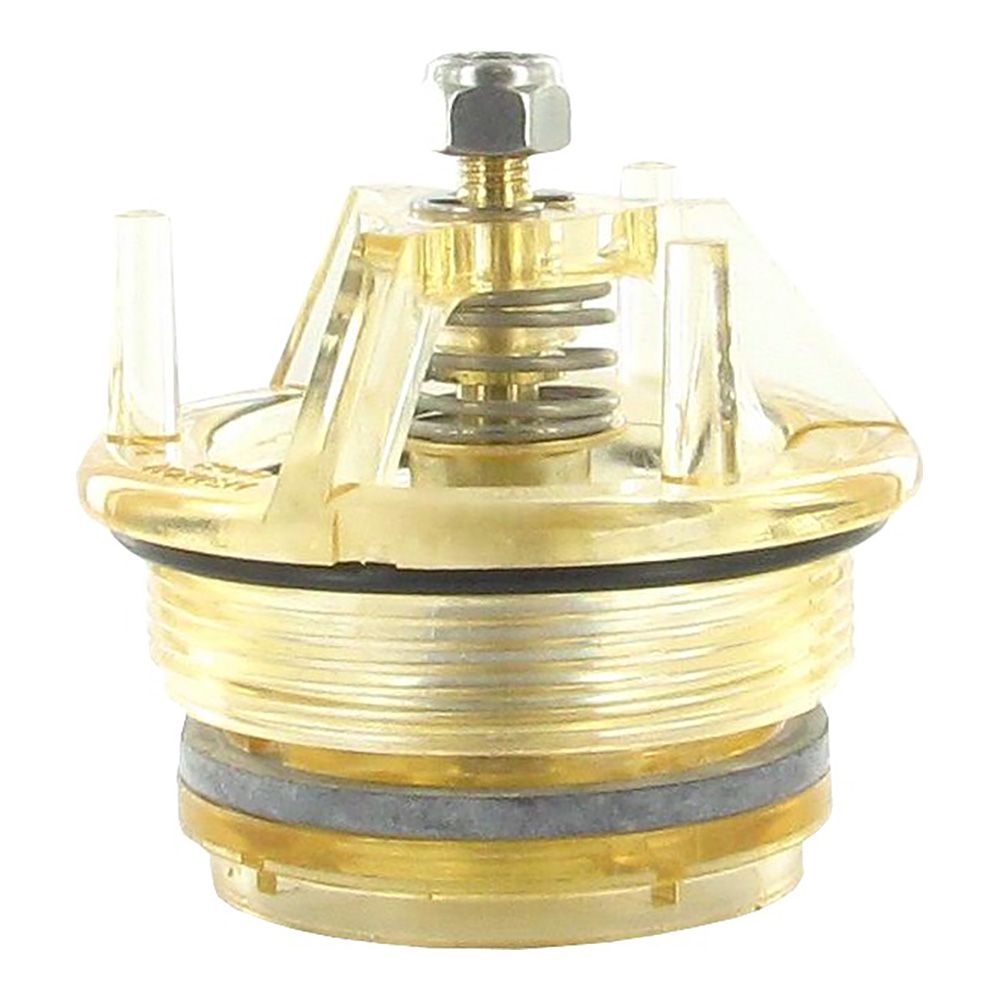
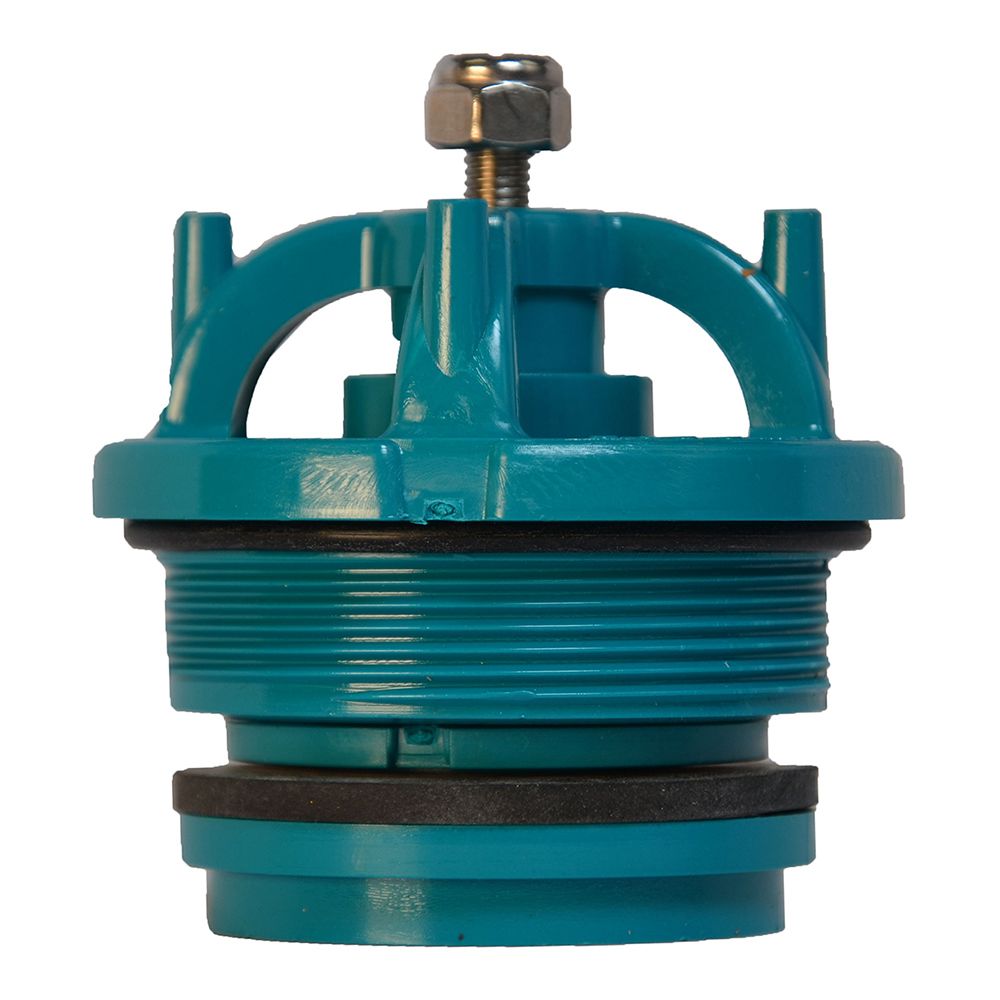
With the old parts removed and the valve body inspected, install the compatible replacement assembly. Use the manufacturer’s directions for component orientation, seals, and tightening requirements.
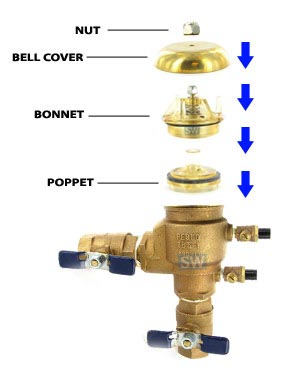
- Position the New Assembly: Fit the replacement bonnet and poppet into the valve according to the kit instructions. Make sure the parts sit correctly and that any supplied seals or other required components are installed in their designated positions.
- Tighten the Bonnet Correctly: Tighten the bonnet as directed by the manufacturer, using the specified torque or hand-tightening method where applicable. Do not assume every model should be hand-tightened, and never overtighten plastic threads or components.
- Check the Fit: Confirm that the bonnet sits evenly and that no parts are visibly pinched or misaligned. If the assembly does not fit as expected, stop and verify that the kit is correct rather than forcing the parts into place.

6: Check the Replacement Parts Before Reassembly
Before closing the device, confirm that the new components are installed correctly and the accessible parts are in good condition.
Use this checklist to catch common problems before restoring the water supply.
| Component | What to Check |
| Bonnet and Poppet | Correct model, orientation, and seating |
| Seals and Threads | Proper placement, clean surfaces, and no visible damage |
| Valve Body | No cracks, damaged threads, or loose plastic fragments |
| Fasteners | No damage; ready to be secured as specified by the manufacturer |
7: Secure the Bell-Shaped Cover
Some pressure vacuum breakers have a bell-shaped cover that must be secured after the new bonnet and poppet are installed. Follow the manufacturer’s instructions for positioning the cover and tightening any retaining hardware.
- Position the Bell: Place the bell-shaped cover over the assembly as directed by the manufacturer. Make sure it sits correctly without pinching seals or interfering with the internal components.
- Secure the Retaining Hardware: Tighten the retaining nut or fastener according to the manufacturer’s specifications. If the design requires the bell to rotate, follow the specified adjustment procedure rather than overtightening it.
- Check the Fit: Confirm that the cover is secure and the assembly is properly aligned. If the parts do not fit together as expected, verify compatibility instead of forcing them into place.
8: Restore Water and Test the Backflow Preventer
Installing a new bonnet and poppet does not automatically confirm that the backflow preventer is functioning correctly. Restore the water supply according to the manufacturer’s startup procedure and check the device before returning the irrigation system to service.
- Open the Supply Gradually: Follow the specified startup sequence for the shutoff valves and backflow preventer. Opening valves too quickly or in the wrong order can cause pressure surges or interfere with proper operation.
- Check for Leaks: Inspect the bonnet, connections, and surrounding valve body for water escaping from the assembly. If you notice leaks, unusual discharge, or failure to operate normally, shut off the water and investigate the cause before using the system.
- Arrange Required Testing: A visual inspection cannot confirm that a backflow preventer meets its performance requirements. Have the device tested by a qualified backflow tester when required by local regulations or the manufacturer’s instructions.
Protect Your Backflow Preventer From Future Damage
Freezing temperatures can damage your replacement parts and the rest of the backflow preventer. Before winter, install a properly sized backflow insulation cover and follow the manufacturer’s winterization instructions for the device and exposed piping. Before restarting your sprinkler system in spring, check for cracks and leaks and arrange any required backflow testing.
Replacing a bonnet and poppet can extend the life of a backflow preventer that’s otherwise in good condition. Use a compatible repair kit, follow the manufacturer’s instructions, and verify that the device operates correctly before returning it to service.
FAQs for Bonnet and Poppet Repair Kit
Where can I find a sprinkler backflow repair kit?
You can find a sprinkler backflow repair kit from irrigation supply stores and online retailers. Check your backflow preventer’s manufacturer, model number, and size to find a compatible kit, whether you need a replacement bonnet and poppet, seals, or other internal parts.
How does a backflow preventer work?
A backflow preventer keeps contaminated water from flowing backward into your clean water supply. It uses valves or other internal mechanisms to stop reverse flow when water pressure changes, helping protect drinking water from fertilizers, dirt, and other contaminants.
What causes a sprinkler valve to leak from the top?
A sprinkler valve may leak from the top because of a damaged diaphragm, worn seal, loose bonnet screws, or a cracked valve body. Debris trapped inside the valve can also prevent it from sealing properly. Shut off the water supply, inspect the valve for damage, and replace worn parts as needed.
If you want to stay up-to-date on the latest Sprinkler Warehouse news and make the most of all of our one-of-a-kind promotions, join the Irri-Gator community today. Happy watering, Irri-Gators!