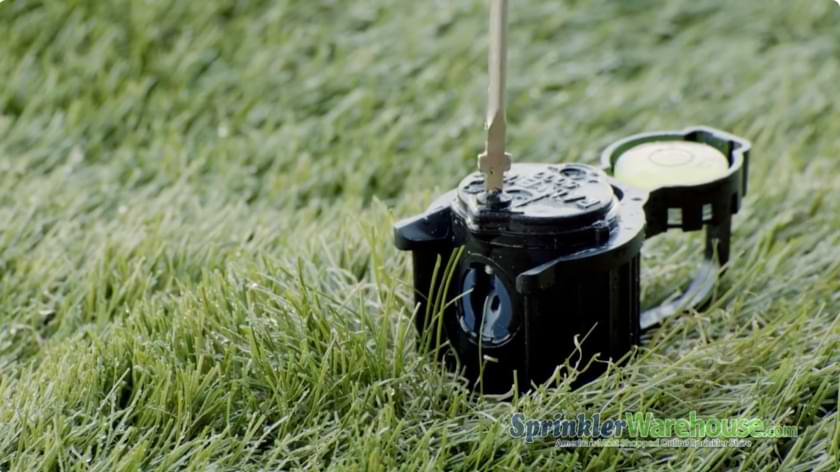
How to Adjust Rain Bird 5000 Pop-Up Sprinkler Heads
Table of Contents
Rain Bird 5000 Sprinkler Head Adjustment Guide
When your lawn isn’t getting the water coverage it needs, chances are your sprinkler system needs a little fine-tuning—especially if you’re using a Rain Bird 5000 Series rotor. These rotors are popular for their durability, reliability, and wide throw range, but like all irrigation components, they need to be adjusted properly for maximum efficiency.
Here’s a simple step-by-step guide to adjusting your Rain Bird 5000 sprinkler head, whether you’re a DIY homeowner or a seasoned irrigation pro looking for a refresher.
How to Adjust a Rain Bird 5000 Series Rotor
Fine-tune your Rain Bird 5000 sprinkler head to achieve even coverage, prevent overspray, and get the most out of your irrigation system. Whether you’re correcting dry patches, dialing in spray distance, or matching irregular lawn shapes, the Rain Bird 5000 makes it easy to customize your watering zones.
A few simple adjustments—such as setting the arc and radius—can make a big difference in performance, reduce water waste, and help keep your lawn lush and healthy all season long. With just a screwdriver or rotor tool, you can take control of your irrigation with precision.
1. Gather What You’ll Need for the Rotor Adjustment
Before adjusting your Rain Bird 5000 rotor, it’s important to have the right tools on hand to ensure a smooth process. Most homeowners can complete these adjustments in minutes with basic equipment.
Here’s what you need:
- A flathead screwdriver
- A Rain Bird rotor adjustment tool (recommended but optional)
- A little patience (these adjustments can take a few tries)
2. Understand the Basics of Changing a Sprinkler Head Rotor
The Rain Bird 5000 Series sprinkler head rotor is preset for general use but designed for easy customization. Whether you’re adjusting arc or radius, understanding how the rotor works is key to maximizing efficiency.
- Arc (the angle the sprinkler rotates)
- Radius (how far the water sprays)
3. Adjust the Spray Arc
The arc adjustment on your Rain Bird 5000 determines how wide the sprinkler rotates. If you’re watering a narrow garden bed or a wide-open lawn, customizing the arc ensures the right coverage.
To adjust:
- Locate the arc adjustment slot on the top of the sprinkler head. It’s marked with a plus (+) and minus (–) sign.
- Insert the Rain Bird rotor tool or a small flathead screwdriver into the arc adjustment slot.
- Turn clockwise (+) to increase the arc up to a full 360 degrees.
- Turn counterclockwise (–) to decrease it to as little as 40 degrees.
Tip: The left side of the spray pattern is fixed, so always position the sprinkler with the left edge aligned to where you want the spray to start.
4. Adjust the Spray Distance and Radius
Dial in the right radius for your Rain Bird 5000 sprinkler head to make sure water isn’t being wasted—or falling short. This adjustment changes how far the spray reaches.

To increase or decrease how far your rotor throws water:
- Find the radius adjustment screw located on top of the nozzle area.
- Use your screwdriver or rotor tool to turn the screw clockwise to decrease the radius.
- Turn counterclockwise to increase it, up to the nozzle’s maximum reach.
Note: Turning too far clockwise can shut off the spray completely.
5. Fine-Tune the Spray Pattern
Need even more control? Customize your Rain Bird 5000 rotor with interchangeable nozzles to tailor water flow and spray angles to each zone of your yard.
- Unscrew the top and gently pull up the riser.
- Remove the existing nozzle and replace it with your preferred size.
- Re-tighten the assembly and check for leaks.
6. Test and Observe Your Rain Bird 5000 Sprinkler Head Rotor
After adjusting your Rain Bird 5000, run a test cycle and evaluate how the rotor performs. Small tweaks now can prevent dry spots and overwatering later.
Turn on your irrigation zone and observe the rotor in action. Look for:
- Even spray coverage
- Proper arc and radius
- No water overshooting onto sidewalks or driveways
If needed, go back and make small adjustments. The goal is to reduce water waste and ensure your landscape gets the hydration it needs.
Rain Bird 5000 Adjustments for Every Landscape
Adjusting your Rain Bird 5000 sprinkler head rotor is a simple yet powerful way to improve the overall performance of your irrigation system. With just a few small tweaks, you can ensure your lawn receives consistent, targeted watering exactly where it’s needed—no more dry spots or wasted runoff.
These easy adjustments help conserve water, lower your utility bills, and support a greener, healthier lawn year-round. Regular maintenance keeps your Rain Bird 5000 working like new—and your yard looking its best.
FAQs for Rain Bird 5000 Adjustment
How to adjust the Rain Bird 5000?
To adjust your Rain Bird 5000, use a flathead screwdriver or the Rain Bird rotor tool. Insert it into the arc adjustment slot on top of the sprinkler head. Turn it clockwise to increase the spray angle or counterclockwise to decrease it.
How do you adjust the spray pattern on a Rain Bird?
Adjusting the spray pattern involves setting both the arc and the radius. Use the arc adjustment slot to change the spray angle, and the radius screw near the nozzle to control how far the water sprays. Always align the left side of the pattern first, since it’s fixed.
What is the distance control on the Rain Bird 5000?
The distance control sets how far the water sprays from the sprinkler head. It’s located on top of the nozzle and adjusted with a screw. Turning it clockwise shortens the throw; turning it counterclockwise increases the distance.


