The 6000 rotor has been a staple for a long time in the irrigation world. It’s a solid rotor that’s easy to configure. In this video, we’ll discuss a few features and we’ll show you how to change out a nozzle and make some adjustments. I’m your Sprinkler Warehouse product specialist, let’s get started.
Top Feature Of The 6000 Rotor
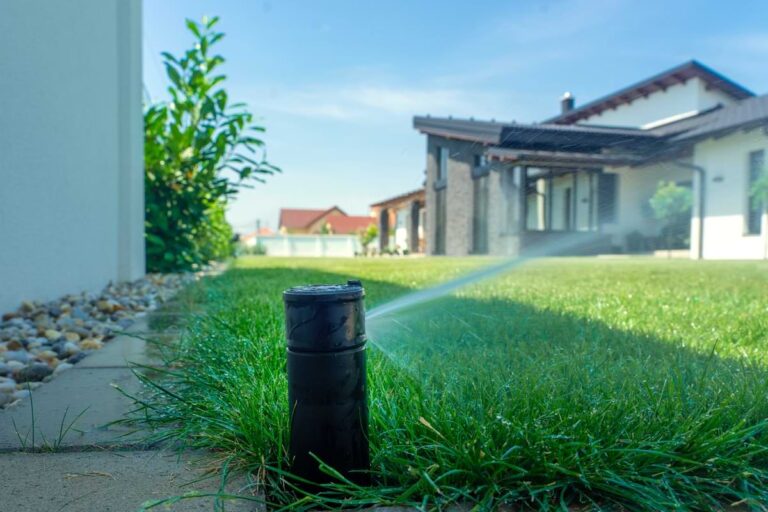
The 6000 rotor has been around under a few different manufacturers’ names. It’s been sold as Nelson, Signature, and Weathermatic, each time called the 6000. Most recently known as the 6000E. It’s a reliable solid rotor with a unique adjustment system. The cap comes off the top like this. There’s a screw you can use to hold it in place, which I recommend using.
Inside, this mechanism right here adjusts your arc. Just move it by hand to set the arc. The arc adjusts anywhere from 40 to 310 degrees. Or it becomes a full 360 full-circle pattern by pulling out this collar and flipping it over. The pop-up height on this rotor is four inches and it has a three-quarter inch inlet. The radius, that is, the watering distance, is from 23 to 51 feet depending on which nozzle you use and how the adjustment screw is set.
This rotor comes with this set of nozzles. Looking at the top of the rotor This is the radius adjustment slot. Use the metal part of the Weathermatic rotor tool right like this. This is the pull-up slot. Use the plastic part of the Weathermatic Rotor tool like this. And this o-ring here is the check valve. If you want to add the check valve to your rotor… Unscrew the top.
Benefits Of The 6000 Rotor
Put the o-ring right here. And close up the rotor. Now you’ve got a check valve. Let’s look at 6000 in the field. We’ll start by changing out the nozzle. Insert the plastic end of the rotor tool into the pull-up slot. Twist 90 degrees and pull up. I’m using a hold-up tool, sometimes called a nozzle insertion collar to make this easier.
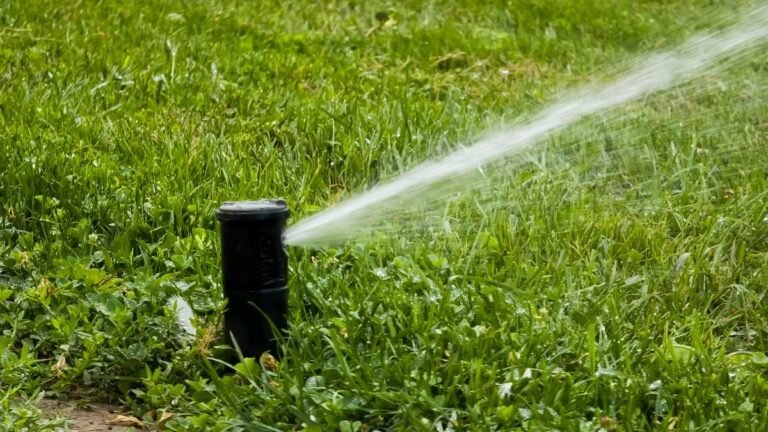
If you don’t have a nozzle insertion collar you can just hold the riser up with your hand. Back out the radius adjustment screw, by using the metal portion of the rotor tool. Pull out the nozzle using a pair of needle-nose pliers. Push in the new nozzle. It goes in at a slightly downward angle. The wings on the nozzle should be up. If you find it difficult to get the nozzle all the way in, you can use part of the rotor tool to push it the rest of the way in.
Screw back down the radius adjustment screw. You want it to be screwed down far enough to break up the stream of water. You can adjust the watering distance with this same screw. Adjust the rotor’s pattern. Remove the cap. If there’s a screw holding the cap in place you’ll need to remove that. This little piece on top is called the click set disk. You adjust the pattern, that is how far the rotor turns, by moving the little tabs on the click set disk. To change the rotor to 360-degree rotation. Flip the discover.
Learn More At Sprinkler Warehouse
Remember Sprinkler Warehouse has everything for your irrigation needs. So, your trees lawn flowerbeds, and gardens are lush and beautiful. And if you have any questions about our products. Chat with one of our superb customer service agents on SprinklerWarehouse.com. They really know their stuff, and they will get you squared away. Subscribe to our YouTube channel for helpful tips tutorials and general sprinkler instruction. I’m Dwayne Smith for Sprinkler Warehouse, America’s Most Shopped Sprinkler Store.